This blog is all about Food. Real Food. Food that Nourishes, Heart and Soul.

Real Ingredients, Organic and Locally sourced whenever and where ever possible, shared with love.

No packages, no ingredients that are impossible to pronounce.

Real, honest food, from my kitchen to yours. Enjoy!

Showing posts with label Cheese. Show all posts

Sunday, 25 January 2015

Grain Free Pizza Crust

We topped this one with my tomato confit, fresh
grape tomatoes, black olives, fresh basil, and
a sprinkle of Black River old cheddar/brick
shredded cheese. 
A while back, on my Facebook food page, I posted a link to these delicious little cheese balls. Pretty easy to make and darn tasty to boot! They were the closest thing to real bread that I have had in years! The recipe got my brain to working though, as I thought of all the things that this type of dough would be great for.  Naan bread was the first creation, and although I still want to tweak the recipe a bit before I share, it is exactly what my curry dishes have been missing since going grain free. Pizza was the next experiment, and it was a beautiful success. It goes on the parchment paper as a sticky gooey mess of muck, and comes out as a wonderfully crisp thin yet chewy pizza crust. Add some toppings, bake again on a hot pizza stone, and you have an amazing grain free pizza, no yeast, no grain and no belly ache to be found!
I played around with the technique from the cheese ball recipe, as I found mixing the hot milk into the dry ingredients in the mixer was much easier, and I changed up the ingredient list a wee bit to get a better texture for what I was aiming for.  The results are amazing, and I am so excited to share!
 If you don't have a pizza stone, I am sure this would work fine on a baking sheet, just be sure to use the parchment
 paper in the first step, as i think it may stick to the pan without it. The stand mixer is necessary, as getting everything mixed would be impossible without it!

Grain Free Pizza Crust

1 cup milk
1/3 cup avocado oil
1 ½ cup tapioca starch
1/3 cup arrowroot starch
¼ cup coconut flour
1 tsp salt
2 eggs


Put a pizza stone on the middle rack of your oven. Preheat oven to 450F


Heat milk and avocado oil in a small pan over med low heat until you just see bubbles forming on the sides, not boiling, but nice and warm.

Meanwhile, measure the dry ingredients into a stand mixer and mix on low until blended.


With the mixer still running, slowly pour the warm milk/oil mixture into the dry ingredients and mix until blended. It should come together in a nice, somewhat sticky dough.


Mix on medium for 3-4 minutes until the “dough” cools down enough that you can touch it with your hand (with the mixer turned off of course!!) . If it is too hot the eggs will cook instead of blending in. 


When the dough is cool enough, add the eggs one at a time and continue to mix on low until everything is well combined. It will take a bit to come together into a nice smooth but sticky dough.  When the dough starts coming together well, turn to medium and mix for a full 2 minutes until thoroughly combined.


Using a rubber spatula, turn dough onto a large piece of parchment paper. 

Wet your hands (you may need to wet them a few times during this process, it is sticky!) and spread dough out on parchment paper with hands into whatever pizza shape you desire, making it nice and even and about 1 cm thick.


Using a pizza peel or the bottom of a cookie sheet, slide the dough (still on the parchment paper) onto the preheated pizza stone and bake for 10 minutes.
Remove from oven, using a pizza peel or the back of a large cookie sheet.

 top with desired ingredients, and bake again until toppings are hot thru 
and cheese is bubbly (if using), usually 6-8 minutes ish. 


Slice and serve hot!

This one was topped with a smokey bbq sauce, bacon, pepperoni,
mushrooms, jalapenos, and an old cheddar/brick cheese blend
 from  Black River Cheese, that was perfect!


Saturday, 16 August 2014

Bacon Wrapped Stuffed Jalapenos

We generally have very little luck growing peppers of any kind in our garden. So when the lone jalapeno plant that we very apprehensively planted this year sprouted these beautiful spicy babies, we felt they were worthy of something special.
 Add some lovely Mark’s Almost Famous Bacon,
(can't seem to find a website to link to, but we sell it at Goodness Me!)
 and some cheese, and you have an awesome appetizer, guaranteed to please! I used a lovely Gouda that paired nicely with the flavour of the thyme and smoked sea salt. (If you don’t have smoked sea salt, substitute with a nice Celtic or Himalayan sea salt.) The red peppers are actually just ripe jalapenos. When they ripen and turn red they have a slightly sweeter and hotter piquancy to them. Green or red, whatever colour you happen to have, this recipe is tasty and so darned easy, you have to make them!! I highly recommend wearing gloves when you take the ribs and seeds out of the peppers, my thumbs are still tingling as I type out this recipe, and I really was being ever so careful to limit my exposure to their heat.

Bacon Wrapped Stuffed Jalapenos
I had two very large and two
fairly small Jalapeno's, this
amount of filling should fill 4
average sized jalapenos
very nicely.

4 Jalapeno peppers
8 slices of nitrate free bacon
2/3 cup cream cheese
2 cloves garlic, minced
½ tsp dried thyme (rubbed between your palms to crush well)
½ cup grated Gouda cheese (Mine was a very generous ½ cup!)
Smoked Sea Salt and Fresh Ground Black Pepper to taste

Preheat oven to 375F.

Wearing gloves, cut the jalapenos in half lengthwise, and remove the ribs and seeds and discard. Set peppers aside.
In a medium sized mixing bowl, mix the cream cheese, garlic, thyme, Gouda, salt and pepper together until well incorporated.
Divide filling evenly between the pepper halves, and wrap each with a strip of bacon, securing with a toothpick.

Place in an oven safe dish and bake for 35-40 minutes or until the bacon is fully cooked and just beginning to crisp up. The cheese should be softened and starting to bubble.

Remove from oven and cool slightly before serving. Best eaten while still warm J
We served them with prime rib steak,
pan fried portabello mushrooms,
freshly picked Swiss chard and
pan fried potato slices...heaven!!


Sunday, 22 September 2013

Cheesy Swiss Chard and Onion Bake

My Swiss chard is still going strong in the garden, and I am always trying new ways to prepare this lovely leafy green. I threw this together tonight to go with this recipe.  (see my comments at the end of this post about the meat loaf recipe!) Supper was pretty darn tasty!  You could substitute any leafy green of your choice here, kale would be lovely, but would take a little longer to cook.

Cheesy Swiss Chard and Onion Bake

2 bunches Swiss chard, any colour (mine is a mixture of red and green)
1 large red onion, chopped
2 tbsp butter
½ cup cream
Salt and pepper to taste
½ cup grated Parmesan cheese

Preheat your oven to 375F

Rinse the chard and then remove the large middle stem from the chard leaves. Roughly chop the remaining greens and set aside.
In a 8-9 inch cast iron (or other oven safe ) pan, melt the butter over medium high heat. Sauté the onion until it starts to soften and brown slightly. Start adding the chard by the handful, stirring after each addition until it wilts down.(it will look like you have a TON of chard to add, but it will wilt down, really it will!)
 As soon as you have all the chard in the pan and it is all nice and wilty, add the cream, and salt and pepper to taste. Cook for approx. 5 minutes or until the cream reduces slightly. Turn off the burner, and sprinkle the cheese over top of the chard and onion mixture.
Using an oven mitt, (because the handle of your pan is probably hot!) place in the preheated oven for 20 minutes, or until the cheese is nicely melted and browned. Serve immediately!


A recipe from Real Simple, well worth trying!
The only thing I did differently to the meat loaf was to leave out the ground pork (It is hard to find a good clean source of ground pork in my area, and I am not all that fond of it anyway—I just left it out all together) I also used coconut sugar instead of brown sugar. Other than that, the recipe was exactly as written, and was very very good! The roasted cherry tomatoes become a smoky sweet topping for the meat loaf,  It does use oats, which I use sparingly and only occasionally. Although this makes this recipe not grain free,  I think cooked quinoa would be a great substitute if you wanted to keep it grain free)

Thursday, 12 September 2013

Grain Free “Battered” Cauliflower


I found this recipe browsing on Pinterest the other day, and being as I had a nice head of organic cauliflower in my fridge, decided it was the perfect time to try it out. But, I was already marinating this chicken to go on the BBQ for dinner, and the buffalo flavour for the cauliflower just didn't seem to match. Being as I already had to tweak it to make it grain free, I ended up changing the entire recipe to suit the flavours of my chicken. The concept is similar, but the recipe is totally new, and incredibly tasty!! My eldest son, who generally doesn't like cauliflower, declared it “delicious”, much to my surprise.  I can’t wait  to try a grain free version of original recipe, but for now, this one is a keeper!!

Grain Free “Battered” Cauliflower
4 T coconut flour
1 tbsp chick pea flour
¾ cup water
1 egg
1 clove garlic
1 tsp Herbamare
½ tsp dried basil
½ tsp dried oregano
____
½ cup grated Parmesan cheese
3 Tbsp arrowroot powder
4 cups bite sized pieces of cauliflower(approx 1/2 of a large head)

Preheat oven to 425F.
Place all ingredients  except for the Parmesan, cauliflower and arrowroot in a blender and blend until completely pureed.
Let stand for 5 minutes to thicken up.
Chop your cauliflower into bite sized pieces, place in a large bowl or ziplock bag and toss with the arrowroot powder.
When “batter” has thickened up, toss with cauliflower until all pieces are well coated.
Scrape out onto parchment lined pan. sprinkle with Parmesan cheese, and bake for 45-50 minutes, or until the pieces are starting to brown nicely.
Serve hot alongside this chicken and a tossed green salad.

.

Tuesday, 11 June 2013

Bruschetta Egg Skillet with Spinach and Fresh Basil

I made this for my oldest son one night for a quick dinner, when he said he had no time to eat before driving school. I literally had it on his plate within 7 minutes flat. I remade it for my hubby for brunch on one of our days off together, and remembered to take  pictures so I could post it. The Bruschetta topping is a recipe that I used in the first cooking class that I taught at Goodness Me. I shared this idea with the class, because the Bruschetta topping is so versatile, it pays to make extra.

Bruschetta Egg Skillet with Spinach and Fresh Basil

3 cups roughly chopped organic baby spinach
1 tbsp coconut oil
1 tbsp butter
6 eggs
½ tsp Herbamare or sea salt of choice
½ cup Bruschetta mixture (recipe below)
¼ cup freshly grated Parmesan cheese
2 tbsp Chopped fresh basil (or sub other fresh herbs of choice, garlic chives would be awesome!)

Beat eggs in a medium mixing bowl, add Herbamare and stir to combine. Set aside
Preheat broiler to high, and move  rack to the upper half of the oven.
Heat oil and butter in a medium to large cast iron (or other oven safe) pan over medium high heat. Sauté spinach until wilty, 1-2 minutes. Add beaten eggs, and let cook undisturbed for a few minutes. Using a wooden spatula, tip the pan slightly and pull the cooked egg back from the edge of the pan, letting the uncooked egg run underneath. Repeat around the pan a few times, until the eggs are almost set on top, this should take just a few minutes.
Remove pan from heat. Spoon the Bruschetta mix evenly around the pan on top of the almost cooked eggs, top with grated cheese, and place under broiler until the edges of the egg are starting to brown nicely, and the cheese is just starting to bubble. Keep an eye on it at all times, you don't want it to burn!!


Remove from broiler (remember the handle will be hot!!!) and cut into 4 wedges in the pan. Remove each wedge to a plate and top with chopped herbs. Serve hot and enjoy!

Bruschetta Topping

1 410g can diced tomatoes, drained well
1 tbsp olive oil
1 small clove of garlic, minced
1 tbsp chopped fresh basil (or 2 tsp dried)
¾ tsp salt
Grind of fresh black pepper
Splash of balsamic vinegar

Topping Directions:
Drain tomatoes well, add other ingredients and stir well to combine.  Let stand for ½ hr for flavours to meld. If using dried basil, let stand closer to an hour for the basil to rehydrate.

Tuesday, 9 April 2013

Zucchini Spinach Salad


I made this salad for my brothers birthday dinner on the weekend. There was an awesome picture of a similar salad on Pinterest, but when searching for the actual recipe, there were only links to the picture. So, me being me, I invented my own. I think it turned out pretty well. I had the leftovers for lunch the following day and it holds up well. I almost liked it better after it sat, so don’t be afraid to make it in advance!  Feel free to use any feta you like, but I highly recommend using the Raw Sheep's Milk Feta from Best Baa, it is my favourite feta EVER!!

Zucchini Spinach Salad

Salad:
6 cups organic baby spinach, lightly packed
1 medium organic zucchini, sliced thin
1/3 cup chopped fresh organic basil
½ cup toasted organic pumpkin seeds
½ cup dried organic, juice sweetened cranberries
2/3 cup Best Baa Raw Sheep Milk Feta, crumbled (or feta of choice)
Dressing:
1/3 cup organic olive oil
Juice of ½ an organic lemon
3 Tbsp rice wine vinegar (or white balsamic)
½ tsp Herbamare or sea salt
1 tsp ground black pepper

I used my spirulizer to get
the zucchini nice and thin, you
could also use a mandolin or
a vegetable peeler to get
nice thin slices!
Toss the salad ingredients together in a large bowl.
In a small bowl, combine dressing ingredients, and toss well with combined salad ingredients.
Serve right away, or refrigerate till needed, up to 8 hrs.

Wednesday, 27 March 2013

Grain Free Cauliflower Pizza Dough


I have made many attempts at grain free pizza. And they all, while being pretty tasty, failed in the pizza–like crust department. The grain free ones were too dry, the cauliflower ones too wet.  We had yet to have one that could be picked up and eaten out of hand. Until now! I ate two slices with no fork!! This worked spectacularly. Although it is not highly reminiscent of the yeasty risen wheat dough that causes me so much belly-grief, it is the best grain free pizza dough I have tried to date.  I look forward to making it again! (and again...and again...)

Grain Free Cauliflower Pizza Dough

1 small-medium head org. cauliflower
1 generous tbsp coconut oil
1 ½ cups almond flour
2 Tbsp arrowroot flour
1 egg
1 cup grated mozzarella cheese
4 tbsp ground Chia seeds
2 cloves minced garlic
1 tsp Herbamare

Raw Dough
Preheat oven to 425F, using a large pizza stone in the oven if you have one.
Cut cauliflower into chunks and process in your food processor until very fine. (alternatively grate on a box grater into fine crumbs)
Heat coconut oil in large pan, and sauté the processed cauliflower  over medium high heat for 6-7 minutes. (this helps to pre cook the cauliflower without adding water like steaming would)
Set aside to cool slightly.
When cool, mix in the rest of the ingredients and knead with hands until it is very well combined. 
On a large piece of parchment paper, spread “dough” into a large circle (or pizza shape of your choice!) approximately 1cm thick.
Transfer dough on parchment to a pizza peel or to a large sheet pan, and bake in preheated oven for 15 -20 minutes or until the crust is starting to brown nicely.
Cooked Dough
Top with toppings of choice**, and bake for another 8-10 minutes or until the toppings are heated thru and the cheese is melted nicely. We used an organic pizza sauce from Eden, thinly sliced mushrooms, an organic beef pepperoni, and a combo of raw milk mozzarella and parmesan cheeses.
Let cool slightly before indulging!
**go easy on any toppings that are “wet”,  as they will make your crust less crisp.


Wednesday, 13 March 2013

Veggie Egg Muffins


A speedy and  adaptable protein to serve with breakfast, lunch or dinner! Change the veggies and cheese to what you have on hand, adding some crumbled bacon or chicken would be good too. Sautéing the veggies first releases some of the moisture, and ups the flavour factor!


Veggie Egg Muffins

½ cup red onion, diced
2 mushrooms, chopped
1 clove garlic, minced
2 tsp butter, plus more for greasing muffin tins
 1 ½ cups spinach, chopped
6 eggs
Pinch of red pepper flakes
½ tsp salt
1 scant cup of grated cheese

Grease 6 muffin tins generously with butter and preheat oven to 375F
Sauté the onion, garlic and mushrooms until they are starting to just lose their moisture and brown up a bit, about 3-4 minutes. Divide the mixture between the 6 greased muffin tins and set aside.
Chop the spinach and add some to each muffin tin, again  set aside.
Beat eggs, salt and hot pepper flakes well with an immersion blender or whisk (immersion blender works well at adding lots of volume to the eggs) Divide egg mixture evenly in the 6 muffin tins, and top with the grated cheese.
Bake for approx. 20 minutes in preheated oven, or until  set in the middle, puffy and starting to turn a nice golden brown colour.

They will be nice and fluffy when you first take them out of the oven, but will fall slightly as they cool. Can be served hot, at room temp or chilled. Great for lunch boxes!

Sunday, 10 March 2013

Quinoa, Chicken and Veggie Salad with Applewood Smoked Cheddar


Adding the quinoa to this salad while it is hot melts the smoked cheddar so it becomes part of the dressing to this salad. This cheese has a strong smoky flavour, so a little goes a long way.

Quinoa Chicken and Veggie Salad with Applewood Smoked Cheddar

1 cup cooked chicken, cubed
1 carrot, shredded or grated
2 stalks celery, chopped
½ cup broccoli, chopped
¼ cup grated Applewood smoked cheddar
1 apple
½ lemon, juiced (or 2 tbsp)
3 tbsp olive oil
2 tsp grainy mustard
½ tsp Herbamare (or other salt)
1 cup HOT quinoa

In a medium mixing bowl, mix together the chicken, carrots, celery and broccoli. Set aside.

Core and chop one apple and place in a small bowl. Squeeze the juice of ½ of a lemon over the apple and toss. Remove the apple pieces, leaving the lemon juice in the bowl. 

Toss the apple with the chicken and veggies, and again set aside.

To the lemon juice, add the olive oil, mustard and salt. Whisk well to combine.

Add cheese and the dressing to the veggie chicken mixture and toss to coat.

Add the Hot quinoa and stir well to combine.

Chill before serving.

Saturday, 9 March 2013

Quinoa Cakes


I love quinoa.  (pronounced : KEEN-wah) This wonderful little super-food packs a big nutritional punch, giving you protein, iron, fiber  magnesium and potassium, just to name some of its benefits. It is naturally gluten free, and it is technically a seed, not a grain. But it behaves in a very grain-like manner, making it a very versatile ingredient to add to your cooking repertoire. It is a great addition to salads, soups, and casserole type dishes alike. A friend of mine recently made a lasagna with it that I am itching to make!
This recipe is just one of my favourite ways to prepare it. Feel free to change up the veggies, and the cheese to suit your taste-buds or what is in your fridge. The possibilities are endless! They are great eaten warm or cold, and freeze well. Tuck them into your lunch bag with a side salad for an energizing mid-day meal. However you eat them, I am sure you will love them!

QUINOA CAKES
1 cup quinoa, well rinsed
2 cups water
1 cup finely chopped or shredded carrots
2 tbsp finely chopped shallot (onion would do as well!)
Fresh /dried herbs of choice (used dried parsley and thyme in first batch) use slightly more fresh than dried
3 eggs
1 cup grated cheese of choice (used Romano and goats milk mozzarella )
1 tsp salt
½ - 1 tsp Hot red pepper flakes (optional)
1 tbsp arrowroot starch

Bring water and quinoa to a boil, reduce heat , cover with lid, and cook for 15 min. Turn off heat, let sit for additional 5 min. Set aside to cool.
When quinoa is cool enough to work with, mix with rest of ingredients, and pack into greased muffin tins. (I used the bottom of a drinking glass to make the tops flat and compress the cakes nicely)
Bake at 350F for 30 min. Run knife around edges, let sit in pan for 5 min, then gently lift out. Serve warm or cold.

Thursday, 7 March 2013

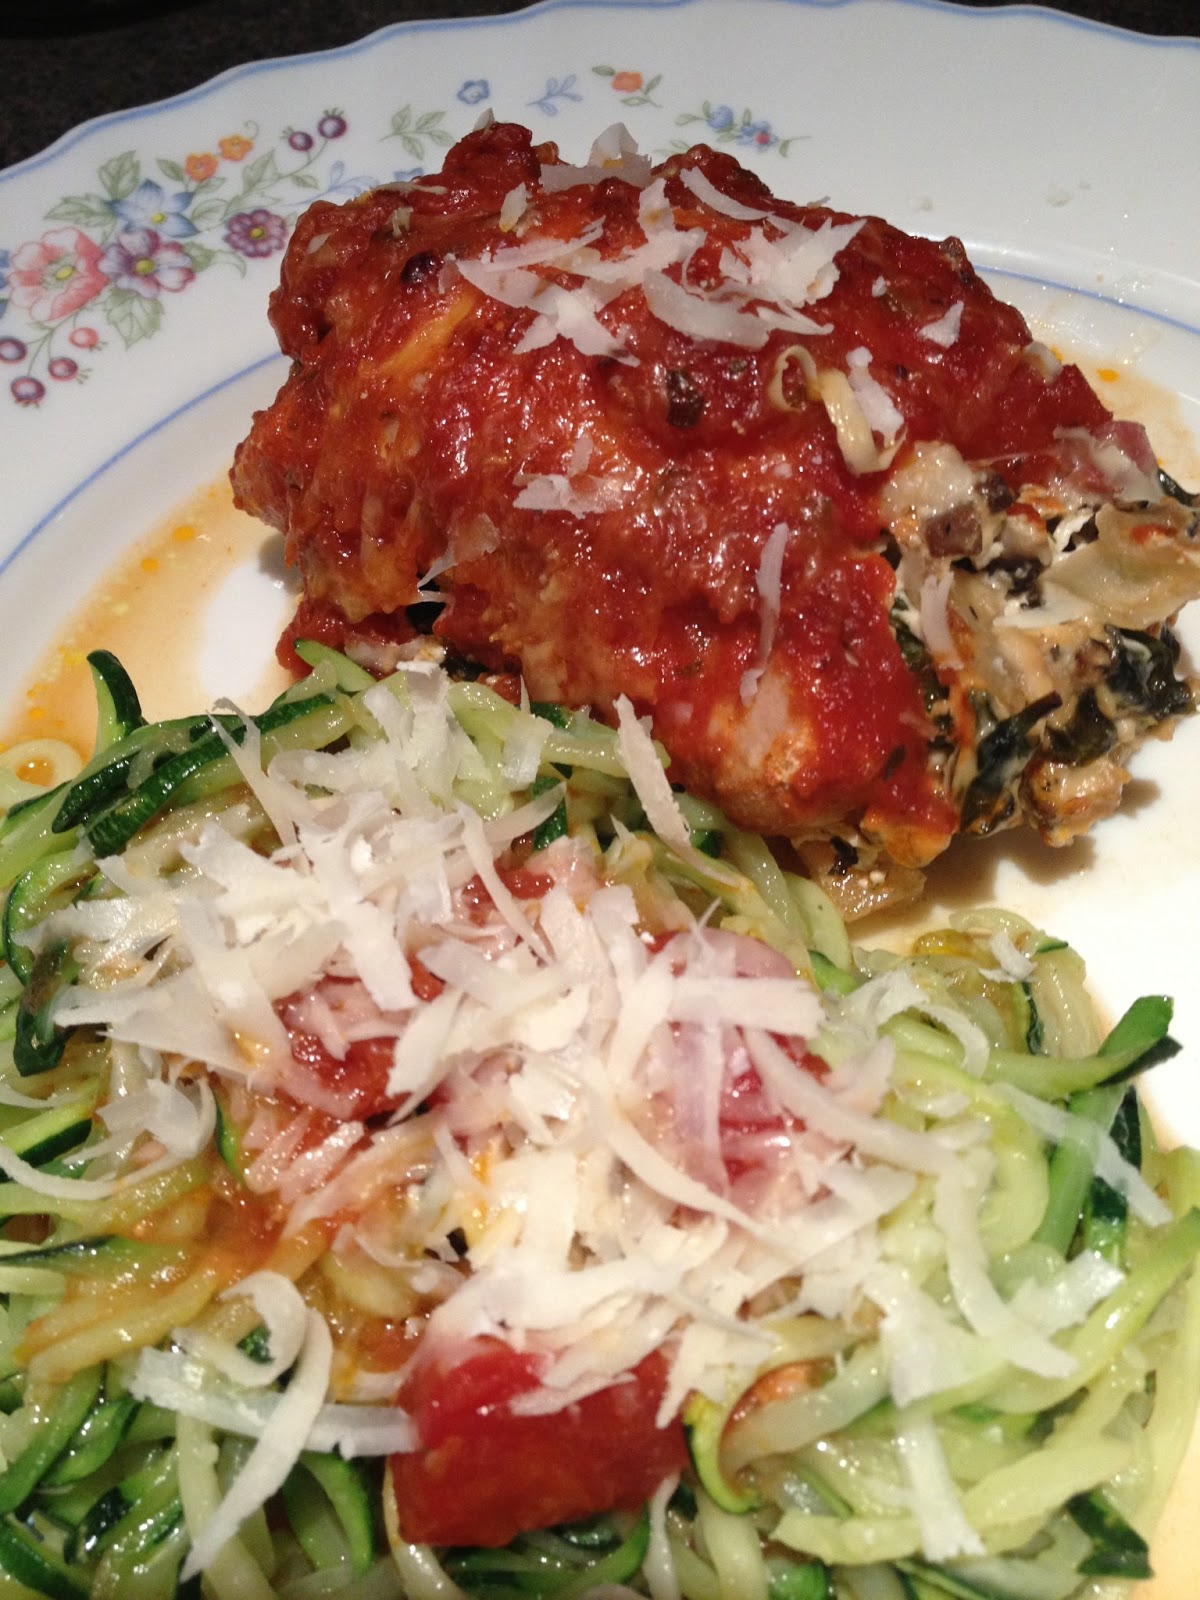
Cream Cheese Chicken Roll-Ups


Days off in my world almost always involve time spent in my kitchen and today was no different. I had some skinless boneless thighs that were screaming for a special recipe. Add spinach and cream cheese, and these beauties were born. This is pretty enough to serve to company, and pretty darn easy to throw together for dinner on a weeknight. I pounded my chicken (well, Jim did the actual pounding…) on a baking sheet under parchment paper. You will want it fairly thin, but evenly pounded to make rolling easy. 


Cream Cheese Chicken Roll-Ups

8 skinless boneless chicken thighs, pounded thin
1 tbsp butter
1 medium onion, finely chopped
2 cloves garlic, minced
1 ½ cups finely chopped mushroom
4 cups chopped spinach
Salt and pepper to taste
1 cup organic cream cheese
2 cups of chunky tomato sauce
¼ cup freshly grated Parmesan cheese

Sauté onion mushroom and garlic in pan with the butter until they start to soften and brown a bit. Add spinach, stir in, and turn off the heat. Season with salt and pepper. Add cream cheese and stir to combine.  Let cool slightly.
Divide mixture evenly between the 8 pounded chicken thighs and spread along the whole length , and roll up like you would a cinnamon roll. Place rolls carefully in a 9x13 baking dish. Cover with tomato sauce, and bake, uncovered at 400F for 45 minutes or until cooked thru.  Serve along with sautéed zucchini noodles.

For Zucchini Noodles:

2 small to medium sized zucchinis
1 tsp salt
1 tbsp butter or coconut oil, mixed with one clove of minced garlic

Prepare your zucchini noodles while the chicken is in the oven.  I use my very cool spiral slicer to slice the zucchini. (a mandolin, or julienne peeler will make the “noodles” as well) 
Place the spiraled zucchini on a few layers of paper towel. Sprinkle with salt, and let sit for about 1/2 hour, to “sweat” (the salt helps it release excess moisture). Place a few more layers of paper towel over top and then roll up (again, like a cinnamon roll) and squeeze gently to absorb the released moisture.  Sauté the noodles in  a nice hot pan with some coconut oil or garlic butter until hot and sizzling, about 5 minutes.  Top with pan juices from the chicken, and a sprinkle of freshly grated Parmesan.

Cherry Tomato, Quinoa And Mozzarella Salad With Spinach (AKA: Another idea for Leftover Quinoa)


When I make quinoa, I always make too much, but the leftovers never go to waste. If I am not making quinoa cakes with the extras, I throw it in the freezer in 1 cup containers. This is a perfect amount to use in a cold salad for lunch. I have had this recipe open on my laptop for a while now, (original recipe from here:  http://www.miasdomain.com/2012/06/quinoa-mozzarella-tomato-salad.html?spref=tw ) it looked so yummy I had to make it. We needed a side to go with our leftover lamb chops for lunch tomorrow, so I threw together a loose version. This is a perfect amount for 2 side salads or one larger meal salad. My amounts were kind of a toss here and a toss there. If you want a more precise version, refer to the original recipe. Her recipe uses basil, but being as something is eating my basil every time I plant it, I substituted my garlic chives.


Cherry Tomato, Quinoa And Mozzarella Salad With Spinach 

I picked a big handful of baby spinach from the garden, approx 1 cup, rinsed and roughly chopped it. Toss in a mixing bowl, and add around 10 cherry tomatoes, halved, ¼ cup chopped garlic chives, juice of ½ a lemon, mini fresh mozzarella balls, 10-15 ish (if yours are big, use 4- 5 and quarter them), 2 tbsp olive oil, salt and pepper to taste. Let flavours mingle for a bit, and enjoy!

Wednesday, 6 March 2013

Cheesy Turkey, Kale and Quinoa Casserole


I love it when inventions end up being awesome. As with many of my days off, I spent a large part of today in my kitchen, and was trying to come up with a plan for dinner. With another turkey day looming in the not so distant future, I figured it was about time to use up some of the leftovers in my freezer from the last turkey day. Add some fresh kale from the garden, yummy quinoa, and a grain free cheese sauce, and it turned into a tasty meal that even my Quinoa-hating-Kale-hating teenagers ate without a single complaint. The smoked Gruyere cheese added a wonderful smoky flavour that melded all of the flavours together into a tasty tasty meal. Definitely a keeper! (We followed it with this butterscotch pudding http://zoebakes.com/2012/03/21/butterscotch-pot-de-creme-a-10-name-for-a-kickin-pudding/print/  , hands down the best I have ever made!)


Cheesy Turkey, Kale and Quinoa Casserole

2 cups cooked turkey or chicken

Quinoa:
2 cups of dry quinoa
3 cups of chicken broth

Vegetables:
2 tbsp butter
1 medium onion, diced
4 packed cups of chopped kale

Cheese sauce:
¼ cup butter
½ cup almond flour
2 cups milk
1 ½ cups grated smoked Gruyere cheese
Salt and Pepper to taste
Topping:

1 tbsp almond flour

Directions:
Cut up your chicken or turkey and set aside.

Make your Quinoa: Bring 3 cups of chicken broth to a boil. Add your quinoa, and let it return to a boil. Reduce heat and cover. Simmer for 18 minutes, or until all the broth is absorbed. Remove lid and set aside to cool slightly. (You won’t use all of what you cooked, save the last cup for another dish)

Prepare your vegetables: Melt butter (2 Tbps) in a large cast iron skillet. Sauté the onion until it begins to soften and just slightly brown (5-7 minutes). Add chopped kale and continue to sauté and stir until it is nice and wilty, about 7 more minutes. Remove from heat and set aside.

Prepare your cheese sauce: Melt butter (¼ cup) in a large pot (you are going to mix everything together in the pot, so be sure to use a big one!). Add the almond flour and salt and pepper and stir till combined and starting to bubble.  Add milk slowly, stirring constantly until it is well combined. Cook for about 3 minutes, stirring constantly, until it thickens slightly. Add grated cheese and stir till melted.

Assemble: To your cheese sauce, add the cut up turkey, 4 cups of the cooked quinoa, and your sautéed kale and onions. Mix well and spoon into a large casserole dish. Top with the remaining 1 tbsp almond flour and bake in a 350F oven for ½ hour or until it starts to bubble around the edges.
Serve hot!