This blog is all about Food. Real Food. Food that Nourishes, Heart and Soul.

Real Ingredients, Organic and Locally sourced whenever and where ever possible, shared with love.

No packages, no ingredients that are impossible to pronounce.

Real, honest food, from my kitchen to yours. Enjoy!

Showing posts with label Eggs. Show all posts

Sunday, 5 April 2015

Grain Free Blueberry Dutch Baby Pancake

Dutch babies are probably my favourite pancake of all time. Anyone who has made pancakes for a crowd will appreciate the simplicity of this lovely oven pancake. Whiz the batter in your blender, pour in the hot pan and let the oven do all the work. No flipping, and you get to eat at the same time as everyone else! 
These also cook beautifully in a big cast iron pan (or multiple single serve ones if you are lucky enough to have them!) We have been known to cook them on the BBQ on those beautiful lazy weekend mornings, when the sun is shining, and the birds are chirping...when the BBQ is not buried in snow...

Grain Free Blueberry Dutch Baby Pancake
We like the darker Grade B
Maple syrup, it has a deeper
more intense flavour!


¼ cup butter
6 eggs
¾ cup whole milk (or alternative)
¼ cup coconut flour
¼ cup arrowroot flour/starch
½ tsp salt
2 tsp vanilla

1 generous cup organic blueberries, fresh or frozen


Put butter in 9x13 glass baking dish. Place in oven and preheat to 425F


Place the rest of the ingredients (EXCEPT THE BLUEBERRIES!) into a blender, and blend on high until thoroughly blended. When oven is preheated and butter is melted and bubbly, (usually by the time your oven is up to temp your butter is ready!) carefully remove the glass pan from the oven (with oven mitts!) and pour the batter from the blender jar into the hot pan. Sprinkle the blueberries evenly and quickly over the batter. 
Return to oven and bake for 15-18 minutes or until the pancake puffs up and is golden around the edges. Remove from oven, cut into pieces and serve hot with topping of choice. 
The leftovers (if you have any!) are wonderful when re-heated in a toaster oven!

Saturday, 7 February 2015

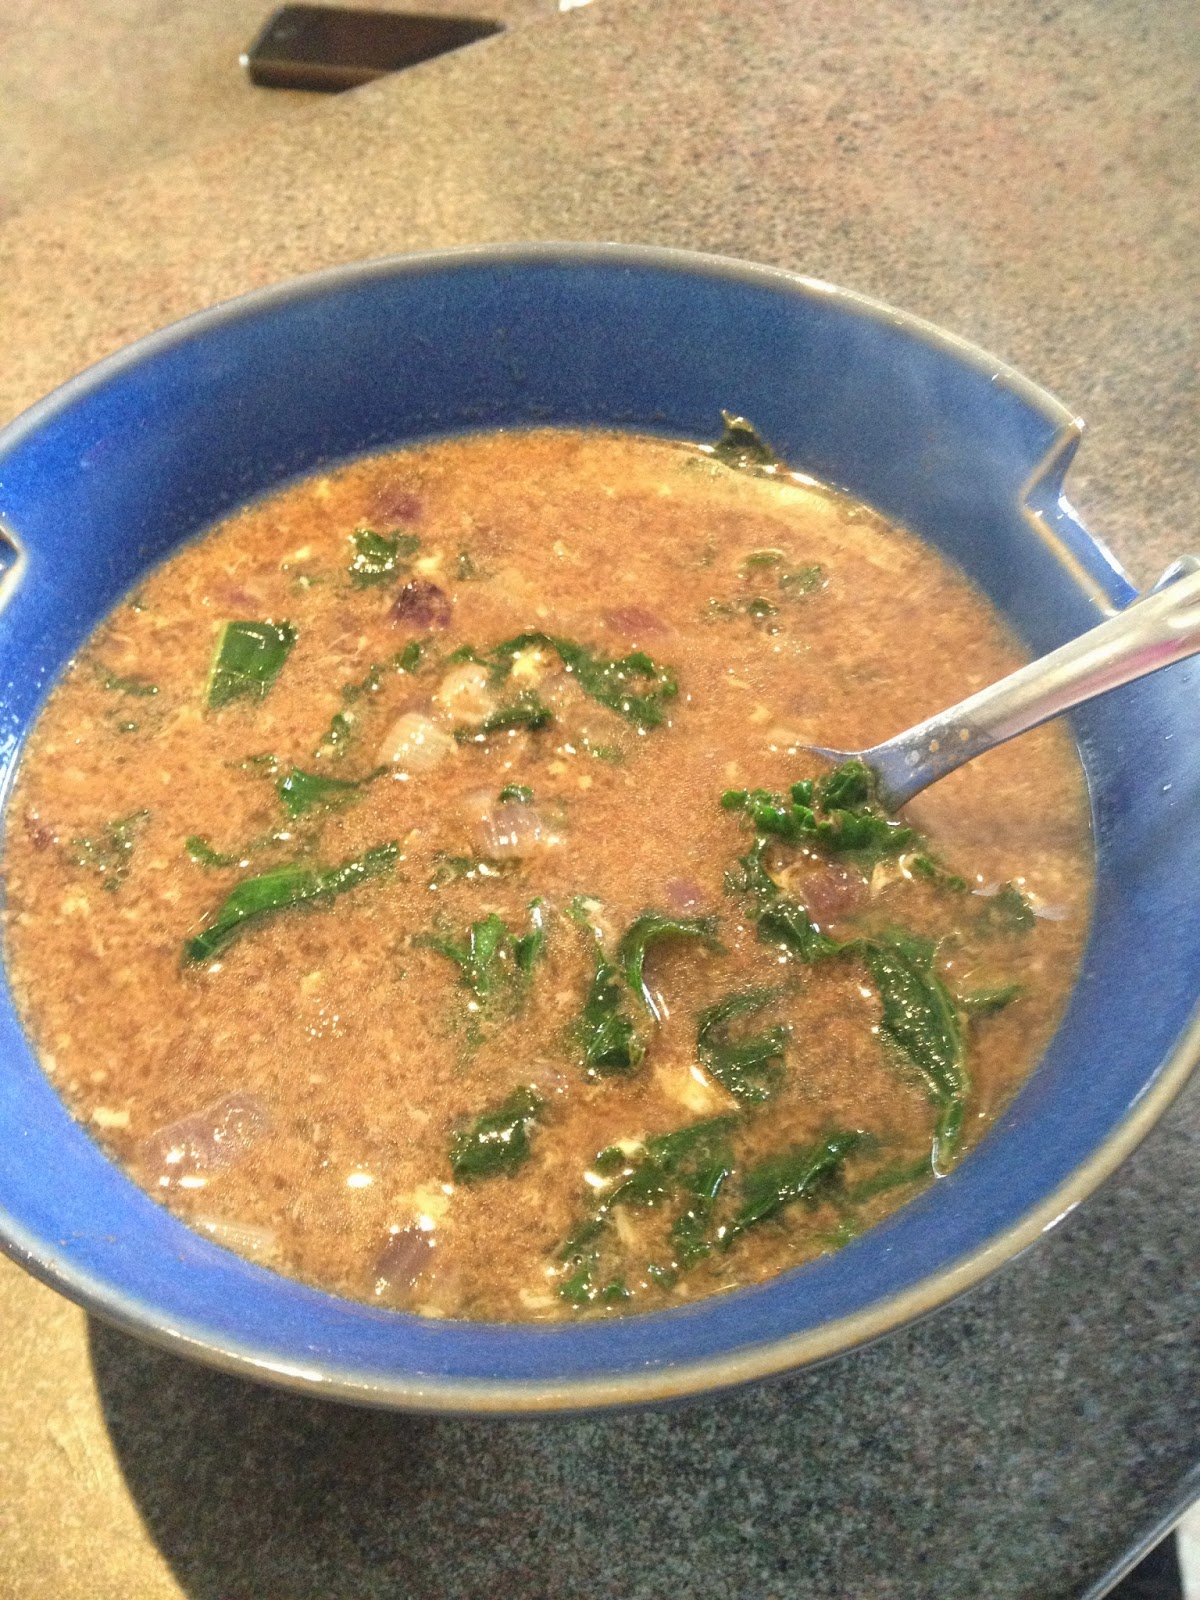
Egg Drop Soup with Kale and Miso

I was driving home the other day, and talking to my hubbie on the phone(using the  Bluetooth in my car, of course...safety first!!) about what he was going to feed me when I arrived home (He had the day off, it was his turn to cook!). He was going thru all of the bits and pieces of leftovers in the fridge, but they were all spoken for already other dinners (these lovely Stuffed Baked Sweet Potatoes from Against All Grain were one of those meals). I could hear his frustration building as we spoke…there was NOTHING to eat quickly….or so he thought, silly guy! I had him start sautéing some veggies, and when I arrived home threw the rest of the soup together in a flash. We had two beautiful bowls of hearty, nutrient dense soup that was absolutely delicious, and ready in about 20 minutes flat. (and the bone broth was frozen too!) Dilemma solved, and in such a tasty way!


Egg Drop Soup with Kale and Miso
Makes 2 generous bowls of soup.
 1 medium red onion, peeled and chopped
1 cup chopped kale, (approx 2 lg leaves) thick stem removed
1 clove garlic, minced
1 tbsp avocado oil (or coconut, or butter)
2 cups bone broth (use beef or chicken, I believe we used beef )
1 cup water
1 tsp Mame miso (or miso of choice)
2 tbsp water
½-1 tsp sriracha sauce (optional, look for one with good ingredients!)
2 eggs, lightly beaten
Smoked sea salt to taste

This is a traditional soybean
Miso... there are many other
types. The flavour will differ
slightly, but any of them
would work!
In a medium pot, sauté the onion and garlic for 2-3 minutes over medium heat. Add the chopped kale and sauté until the veggies just start to brown and soften, 3-4 minutes more approx.  Add bone broth and the first amount of water. Bring to a boil, reduce heat and let simmer. (if your bone broth is frozen, like mine almost always is, add the frozen stock to the veggies, put a lid on the pot and leave on medium heat until melted, then bring to a boil and simmer)
While it simmers, in a small bowl, mix the Miso paste with the second amount of water until well combined.  Add the sriracha if using, and stir into gently simmering soup.
Slowly drizzle the beaten eggs back and forth over the surface of the soup, taking care not to pour all in one spot. Lightly stir (you don’t want to mix the egg in totally) until the egg turns opaque, approx 1 minute.

Season with salt and serve warm. 


Friday, 6 June 2014

Grain Free Sandwich Bread

I will warn you now, this is a long post! But, it is so worth it! This is Grain Free Bread folks! It slices! It lasts at room temperature!(and it actually gets better the next day!) And...it tastes pretty darn good! So bear with the wordiness, and the plethora of pictures. (and the number of exclamation points I may have just used!) I think you can tell, I am really excited to share this recipe!

After embarking on this gluten- free, almost- grain- free journey, bread has all but disappeared from our diets. We were not big sandwich eaters to start with, so lunch packing was never a big issue. Soups, salads and leftovers are our go-to lunches, and this made the transition pretty easy. Our boys were content to have the occasional store bought loaf for when they had a craving for toast.  So it was never anything I put much thought into when creating new recipes. (Actually I did attempt one loaf, from a recipe I found (and promptly lost!) that used only coconut flour, and the resulting brick just “cemented” my decision that life without bread was not such a bad thing!)  But, being as it is probably THE #1 recipe I get requests for above all others, I decided to conquer it, once and for all. It seems to be the one thing most people cannot fathom giving up, and that seems to make or break their decision to stick with this type of diet. So I needed to come up with a tasty, slice-able loaf that would last, preferably without freezing. For those versed in grain free baking, it was a bit of a tall order!

Not one to shy away from a challenge (and this one was a challenge!) I rolled up my sleeves and got to work. I ended up using tapioca starch, an ingredient that I have not played with a lot. It gives this grain free bread the elasticity that is missing using just coconut flour. It is a starch, however, and does contain a fairly high amount of carbs (approx 26g/carbs in ¼ cup) so for those watching carbs and calories, this bread should still be considered a treat, and not a diet staple.  (I roughly worked out the carbs and it rolls in at approx 8-9 g/carbs per slice if you slice the loaf into 14, so not crazy, but again, not a diet staple if you are watching those kind of things) (It does slice thinly very well, you can probably squeeze many more slices out of your loaf…this was just for an example!)

No crumbs!
Enough with the scientific data! If you are OK with using Tapioca starch/flour, you will be very, very, VERY happy with this recipe. (at least I think you will be!) The loaf it makes is not typical bread sized. It is definitely a bit on the shorter side. But what it lacks in size it makes up for in flavour! On the first day, it has a nice crisp crust and a soft, albeit somewhat spongy interior. Day two, after being stored on the counter in a sealed container, the crust becomes slightly chewy, losing its crunch, but not in a soggy bad way at all. It is content to stay on the counter, in a sealed container for 3-4 days, and is almost better on day 3 than day 1, which is pretty cool. (It does seem to mold by day 5 though, just to warn you!) It slices like a dream, hardly a crumb in sight! It makes a lovely sandwich (my friend Robin is curing her own bacon…a BLT party is in the plans!)  and even better French toast. I can’t wait to play around a bit, maybe a cinnamon raisin version? I have used it very successfully for morning toast, croutons, sandwiches, and a very tasty dairy free bread pudding  that I will be posting soon as well(Posted! click on the link). Challenge well met, if I do say so myself :) ***if you scroll to the bottom, I added some pics to show how I use this recipe for Grain Free English Muffins, that are heavenly!!

Grain Free Sandwich Bread

6 eggs, separated
1/3 cup coconut flour
1/3 cup arrowroot flour
½ cup tapioca starch
1/3 cup water, at room temp
1 Tbsp raw apple cider vinegar
1 tsp sea salt
¾ tsp baking soda
1/3 cup coconut oil, melted

Preheat oven to 400 F. Line a loaf pan with parchement (mine measures 9.25 x 5.25 x 2.75 inches, for the cooking time to be the same you will need a similar size) Set lined pan aside for now. (see pictures at the bottom of the post for a tip on lining your pan easier! If you decide to grease your pan instead, grease really really well!)
Place egg whites in stand mixer and whip with whisk attachment until stiff, approx 8 minutes. You don’t want any liquid left in the bottom, or it will make the loaf heavier on the bottom.  (Don’t skip this step, it is very important to the texture of the bread!) (Alternatively use a hand mixer or whisk, but not an immersion blender, it doesn't whip in enough air, the end result will not be the same)
While the egg whites are beating,  measure the rest of your ingredients into an 8 cup mixing bowl and blend well with an immersion blender or a whisk and some elbow grease.
Fold about ¼ of the whipped egg whites carefully into this batter, mixing carefully to combine, but not deflate the volume. Mix in the rest of the egg whites in 3 batches, again being careful not to deflate the egg whites, but combining just enough.
Carefully scrape the batter into the prepared loaf pan, and bake in preheated oven for approx 40 minutes.  
You want to see a nice golden crust. A toothpick inserted in the centre should come out clean.  (bread baking tip from my former baking –with –wheat days, if  you have an instant read thermometer, you want the internal temperature of your loaf to be right around 160F.)
Remove from oven, and lift loaf from pan using parchment. Let cool on wire rack completely before slicing.
Lasts on the counter in an airtight container for 3-4 days. (If it lasts that long without being devoured!) It will have a crisp crust for the first day, and a softer chewy crust after it sits.  I slice any leftovers and freeze, with a piece of parchment or waxed paper between each slice for easy removal one slice at a time)
toasted, served with a tomato and
kale omelet :)

To line a pan with parchment, flip
your pan over, and crease your parchment
paper following the bottom edges of the pan.
Fold them around the ends, kind of like
wrapping a parcel.
Flip your pan back over and your
liner should drop right in your pan! You
may need to re-crease the corners a wee bit to
make the fit nice and snug!


This recipe is a perfect amount to make 8 english
muffins with these awesome little english muffin rings.  
Grease rings well, set on parchement, and bake at 400F
for 16-18 minutes or until they are firm and starting to brown. 

Carefully run a sharp knife around the inside of the rings
to release them, and let cool on a wire rack. They freeze beautifully!
Toasted with a bit of butter and jam...pure grain free heaven!


Sunday, 22 December 2013

Simple Baked Maple Egg Custard

This recipe is so simple, I am not sure why we don’t enjoy it more often. With 4 ingredients that we usually have on hand, it is easy to throw together and throw in the oven to help warm up the kitchen on a blustery rainy day. This recipe does make a large batch, feel free to half it and bake in a 8X8 glass dish instead. This custard needs to bake in a water bath, much like a typical creme brule. This helps to give a nice, moist, steady temperature to cook the custard evenly.  A lot of custard recipes on the internet use a longer slower bake, with lower temperatures, but I haven’t had an issue with the higher heat of my recipe.

Simple Baked Maple Egg Custard 

4 cups milk, preferably full fat and non homogenized
8 Large eggs,  preferably pastured
Served with Roasted Pears
½ cup pure organic maple syrup
1 tsp Vanilla powder or 2 tsp pure vanilla extract

Preheat oven to 400F
Break eggs into a medium mixing bowl and whisk well. Whisk in milk, vanilla and maple syrup. Pour into 9X13 glass pan. Set this pan inside a larger 10x15 glass pan.
When oven is preheated, fill a pour-able vessel (I use a glass measuring cup) with very hot tap water.
Carefully place pans into the preheated oven, and fill the outer glass pan with the hot tap water until it reaches just over halfway up the inner glass pan that is holding the custard.
Bake for 40-45 minutes or until the custard is set in the middle. It should jiggle a bit like jello, and a knife inserted in the middle should come out damp but clean.

Let cool before enjoying. 

Thursday, 20 June 2013

Strawberry Rhubarb Custard

My Grandma Pringle made the best rhubarb pie EVER. Seriously. Of anything I remember her cooking for us, that is the one thing that conjures up memories of her kitchen (there was also an unfortunate chicken liver incident, but we won’t talk about that one, ‘K?) Back to the pie. Whenever I asked for the recipe, her answer was always , and I think I quote, “oh, a little of this, and a bit of that” but never a full recipe to work with. At the time I always thought it was a closely guarded secret recipe, but I now have my suspicions that she, like me, wasn't much of a recipe follower. Sometimes great food just happens, and I think that was the case with the pie.  I tried to recreate that elusive pie over the years, and although some came close, nothing ever quite captured the essence of her pie.  Now that I am grain free, I have sadly  put thoughts of pies out to the proverbial pasture, as grain free pastry is proving to be a very tricky thing, and although I am trying, I have yet to perfect a blog worthy version.  Now perfected!! follow this link for my Grain Free Pie Pastry!
Fast forward to this past Saturday. I was out shopping and just could not resist buying a bag of beautiful organic rhubarb from the Scotscraig Farm Veggie stand that is at Fenwoods during  the vegetable garden season. I have rhubarb in my garden, but due to a last minute transplant, it has been too small to do anything with. Buying my first real rhubarb of the season made me sadly nostalgic for my grandmas pie all over again, and it was relegated to the fridge while I sulked. 


 Driving home from work tonight though, I had one of those kitchen epiphany moments. The best part of Grandma's pie was not the pastry. Although it was good, the creamy rhubarb studded custard was always the shining star of the pie. So, why not just recreate the filling?  Pastry is just a vehicle for the interior of the pie anyway. Home to the kitchen I flew, to rescue the rhubarb from my fridge.  I added some organic strawberries, which sometimes made an appearance in Grandmas’ pies, and I think I hit the nostalgia nail right on the head.  If I close my eyes and take myself back 30 years, I can almost imagine sitting at her big wooden dining room table, surrounded by family after a big dinner, sinking a fork into a piece of her pie. I think she would like my crust-less version, and I know she would be proud that her cooking techniques are alive and well in me.

Strawberry Rhubarb Custard

4 cups rhubarb, chopped
2 cups sliced strawberries
3 Tbsp arrowroot starch
6 eggs
1/3 cup coconut sugar
2 cups whole milk
1 tsp vanilla powder** or 2 tsp vanilla extract

Preheat oven to 375F
Place chopped fruit in a 9 x 13 glass baking dish. Sprinkle the arrowroot on top of the fruit, and stir to coat the fruit.
In a separate bowl, whisk the eggs, and add the coconut sugar, milk and vanilla. Mix well to incorporate.

Pour over fruit mixture and bake in preheated oven for 40-45 minutes or until the custard is set in the middle. Let cool slightly and serve warm, or chill thoroughly and serve cold.

**Organic Traditions has an organic vanilla bean powder that I love to use in baking. Substitute an organic vanilla extract if you wish!

Tuesday, 11 June 2013

Bruschetta Egg Skillet with Spinach and Fresh Basil

I made this for my oldest son one night for a quick dinner, when he said he had no time to eat before driving school. I literally had it on his plate within 7 minutes flat. I remade it for my hubby for brunch on one of our days off together, and remembered to take  pictures so I could post it. The Bruschetta topping is a recipe that I used in the first cooking class that I taught at Goodness Me. I shared this idea with the class, because the Bruschetta topping is so versatile, it pays to make extra.

Bruschetta Egg Skillet with Spinach and Fresh Basil

3 cups roughly chopped organic baby spinach
1 tbsp coconut oil
1 tbsp butter
6 eggs
½ tsp Herbamare or sea salt of choice
½ cup Bruschetta mixture (recipe below)
¼ cup freshly grated Parmesan cheese
2 tbsp Chopped fresh basil (or sub other fresh herbs of choice, garlic chives would be awesome!)

Beat eggs in a medium mixing bowl, add Herbamare and stir to combine. Set aside
Preheat broiler to high, and move  rack to the upper half of the oven.
Heat oil and butter in a medium to large cast iron (or other oven safe) pan over medium high heat. Sauté spinach until wilty, 1-2 minutes. Add beaten eggs, and let cook undisturbed for a few minutes. Using a wooden spatula, tip the pan slightly and pull the cooked egg back from the edge of the pan, letting the uncooked egg run underneath. Repeat around the pan a few times, until the eggs are almost set on top, this should take just a few minutes.
Remove pan from heat. Spoon the Bruschetta mix evenly around the pan on top of the almost cooked eggs, top with grated cheese, and place under broiler until the edges of the egg are starting to brown nicely, and the cheese is just starting to bubble. Keep an eye on it at all times, you don't want it to burn!!


Remove from broiler (remember the handle will be hot!!!) and cut into 4 wedges in the pan. Remove each wedge to a plate and top with chopped herbs. Serve hot and enjoy!

Bruschetta Topping

1 410g can diced tomatoes, drained well
1 tbsp olive oil
1 small clove of garlic, minced
1 tbsp chopped fresh basil (or 2 tsp dried)
¾ tsp salt
Grind of fresh black pepper
Splash of balsamic vinegar

Topping Directions:
Drain tomatoes well, add other ingredients and stir well to combine.  Let stand for ½ hr for flavours to meld. If using dried basil, let stand closer to an hour for the basil to rehydrate.

Wednesday, 13 March 2013

Veggie Egg Muffins


A speedy and  adaptable protein to serve with breakfast, lunch or dinner! Change the veggies and cheese to what you have on hand, adding some crumbled bacon or chicken would be good too. Sautéing the veggies first releases some of the moisture, and ups the flavour factor!


Veggie Egg Muffins

½ cup red onion, diced
2 mushrooms, chopped
1 clove garlic, minced
2 tsp butter, plus more for greasing muffin tins
 1 ½ cups spinach, chopped
6 eggs
Pinch of red pepper flakes
½ tsp salt
1 scant cup of grated cheese

Grease 6 muffin tins generously with butter and preheat oven to 375F
Sauté the onion, garlic and mushrooms until they are starting to just lose their moisture and brown up a bit, about 3-4 minutes. Divide the mixture between the 6 greased muffin tins and set aside.
Chop the spinach and add some to each muffin tin, again  set aside.
Beat eggs, salt and hot pepper flakes well with an immersion blender or whisk (immersion blender works well at adding lots of volume to the eggs) Divide egg mixture evenly in the 6 muffin tins, and top with the grated cheese.
Bake for approx. 20 minutes in preheated oven, or until  set in the middle, puffy and starting to turn a nice golden brown colour.

They will be nice and fluffy when you first take them out of the oven, but will fall slightly as they cool. Can be served hot, at room temp or chilled. Great for lunch boxes!

Wednesday, 6 March 2013

Creamed Kale and Eggs


We like to grow  Dinosaur or
 Lacinato Kale, we find  it is
easier to harvest and wash.


I am always on the lookout for kale recipes at this time of year to make use of the over abundance in the garden. I came across this recipe and couldn't wait to try it! You will need a good cast iron pan, or something similar that can go from the stove top straight into the oven.

Creamed Kale and Eggs

1 medium sized onion
1 tbsp butter
2 cups of chopped kale
½ cup cream (or non-dairy substitute)
4 eggs
Salt and pepper to taste

Preheat oven to 375F

Sauté the onion in the butter in a medium-ish sized cast iron pan. When it is starting to soften and brown, add the kale and cook for about 5 minutes. Stir in the cream and cook for an additional 2-3 minutes, until it reduces slightly. Season with salt and pepper to taste.
Crack 4 eggs into pan on top of the kale/cream mixture, and bake in oven until eggs whites are set, and yolks are still slightly runny. Season with salt and pepper to taste, split between two plates, and enjoy!