This blog is all about Food. Real Food. Food that Nourishes, Heart and Soul.

Real Ingredients, Organic and Locally sourced whenever and where ever possible, shared with love.

No packages, no ingredients that are impossible to pronounce.

Real, honest food, from my kitchen to yours. Enjoy!

Showing posts with label Dairy Free. Show all posts

Thursday, 5 July 2018

Keto Pannacotta with Roasted Strawberry Rhubarb Topping


I've been a bad blogger of late, and offer heartfelt apologies for not sharing many recipes over the past while. I've been on a bit of a ...digestive journey?... for lack of a better way to put it! With the help of my naturopath, I feel like I am making some headway in my digestive health, but it has definitely changed the way I have been eating, as well as my creation of new recipes. 
It has been a journey...I've been off dairy, back on dairy, and now off  all soy, cane sugar, and potatoes, (which includes arrowroot and tapioca starch...for those that have followed my baking in the past...you will understand the lack of baking!!) But...I am feeling much better digestively, so I am more than willing to keep following this path! One major thing that I have noticed is my almost complete lack of sweet tooth now. The only sweetener I have used lately is the Lakanto Monkfruit sweetener , but very sparingly. I  find I am not missing sugar at all!!

So, here's were we enter the Keto craze! Being very similar to the way I've already been eating lately, I decided to give it a go, and see if I could budge some of the weight I have slowly and steadily put on over the past few years. After figuring out my Macros (thanks to my son...lol) and using a tracker to log my meals, I am making progress! But...you all know me well...my creative cook side has been dying to come up with some Keto friendly treats...which leads us here today! I love pannacotta, it is such an easy but elegant dessert for hot summer days. I used my regular pannacotta recipe from this blog as a guide, and created this one, that is both Keto friendly and delicious!! 

This is the very first Keto recipe I have posted, but if you follow me on Instagram, I have posted pic's of many meals over the past few weeks. If there is anything posted there you would like to see written out, let me know!! 

Keto Pannacotta (non dairy)
Makes 6 servings , approx 56 calories each, with 5g carbs, 4 g fat, 1 g protein per serving)
4 tsp gelatin
½ cup water
1 can evaporated coconut milk (see pic at the bottom of this post for the brands I used)
Sweetener of choice (completely optional…I didn’t include any as this coconut milk already has a bit of coconut sugar in it, and I find it perfectly sweet enough for me)

Measure your water into a small pot. Sprinkle the gelatin evenly over the water and let sit for about 8 minutes. After the 8 minutes, place over low heat and stir until gelatin is dissolved. Don’t boil!!
When it is completely dissolved, add the can of evaporated coconut milk and stir well. Add additional sweetener of choice here if using!) Stir well.
Pour into 6 small containers (I use small mason jars with lids. Great for storage and my lunch bag!, but small ramekins would work as well. )

Chill for a minimum of 2 hrs before serving to give it time to set well, especially if you are going to unmold it to plate!
To unmold: run a sharp NON SERRATED knife (a serrated blade will leave funky patterns on the edge of your pannacotta…not so pretty!!) around the edge of the jar or ramekin, turn upside down, and with a gentle shake, unmold your panna cotta onto serving plate.
Alternatively, place topping on top of panna cotta in serving container and serve as is! (see picture below of a regular panna cotta with a mango topping for inspiration!)
Top with topping of choice and serve!


Keto Roasted Strawberry Rhubarb Topping
(makes approx 2 cups, I use about 1.5 tbsp as a serving size...approx 17 calories, 3 net carbs, 1 g protein and 1 g fat)
200 g of rhubarb, cut in smallish pieces (I used approx 5 stalks that were about 12 inches long, they were about finger sized in diameter, for an easy reference)
½  lb strawberries (I used ½ of the clamshell container!)cut in ½ or ¼’s, depending on the size of your berries. You want the chunks to be smaller, just a bit bigger than the rhubarb.
2 tsp Lakanto Monkfruit sweetener (or sweetener of choice)
½ cup water
1 tbsp chia seeds

Preheat oven to 375F
In a glass 8x8 baking dish, place your chopped fruit. Pour in the water and sprinkle sweetener evenly over the fruit. Bake for approx 25 minutes, or until your rhubarb is softened up nicely. Remove from oven and set aside to cool slightly( 10-15 min). Stir in the chia seeds and let stand for approx 20 minutes, stirring often. This will thicken up the liquids and give a loose jam like consistency to your fruit.

When fruit is room temperature, transfer to serving dish or storage container for future use. (2 cup mason jar is perfect!) Keep refrigerated! (should last 4-5 days in the fridge)
used these in the recipe!

this is a regular pannacotta that I made a while back,
with a pureed mango topping, but it gives you an idea
for presentation...I used stemless wine glasses...pretty!!
One of the meal's I posted on Instagram, soooo yummy!!


Saturday, 15 July 2017

Espresso Panna Cotta

Coconut Milk version,
 using a 1/2 cup Mason Jar
pan·na cot·ta
ˌpanə ˈkōdə,ˌpanə ˈkädə
noun
  1. -"a cold Italian custard, often served with fruit sauce or caramel syrup".

Panna Cotta translates from Italian to mean "cooked cream", and has become my favourite summer dessert this year. 
Elegant in its presentation, and simplistic in its preparation, its a win win dessert that doesn't even heat up your kitchen! It does require some time to set properly, so plan accordingly if you want it ready for dessert!

"Richer" version, using a 1 cup  Ramekin, filled 3/4 full
I have made multiple versions of this espresso version this summer, and decided to post my three favourite variations, as they all shine in their own way, and deserve a wee bit of the spotlight, depending on your tastes and dietary needs!
The lighter version is great when you want a dessert that is a bit less substantial, but every bit as lovely and tasty as the other versions. The "richer" version has a much creamier texture and velvety smooth mouth-feel that ups the ante a notch or two, making it just that wee bit more decadent. In the dairy free version (created just for my foodie friend Ken!) the coconut milk marries so well with the coffee flavour, it just might be my favourite... if I was ever forced to choose just one...  

Although I haven't tried it yet, you can also make Panna Cotta with fruit juice...picture a lovely mango Panna Cotta topped with a blackberry thyme coulis....I can see many more versions being created before summer is over!

This recipe does make quite a few Panna Cotta's, depending upon the size of container you choose. You will end up with approx 6 cups of liquid Panna Cotta, so choose your serving sizes accordingly. (feel free to cut the recipe in half, but the extras are a lovely indulgence to keep in the fridge ;) ..... 

When I am making it for company, I will choose several straight sided containers that will un-mold well (short mason jars, ramekins etc) and then pour the rest into various mason jars with lids, to be eaten straight out of the vessel as a treat in our lunches.  

A few quick notes on my choice of ingredients:
  • For the espresso flavour, I like to use Mount Hagen Organic  Instant Coffee. They have a regular and decaf version, that gives a seriously impressive coffee flavour to this dessert. 
  • Coconut sugar is almost always my sweetener of choice, for its lower glycemic rating, and its caramel like flavour. The darker colour will affect the end colour of your Panna Cotta, so if you were making a plain version of this without the coffee granules, you may want to substitute with an organic white sugar or honey to eliminate the caramel colour that this will give. So, feel free to substitute with your sweetener of choice. (I am thinking maple syrup may work well with the espresso flavour as well...hmmmm....)
Enough of my rambling, lets get to the recipe!! 

Espresso Panna Cotta, 3 Ways: 

Lighter Version
Full Fat “Richer” Version
Dairy Free Version
6 cups milk, your choice of lower or full fat
4 cups full fat milk PLUS
2 cups , full fat sour cream
3 cans (400ml)  full fat coconut milk
2 ½ TBSP gelatin powder
2  TBSP gelatin powder
½ cup Coconut sugar
½ cup Coconut sugar
1/3 cup Coconut sugar
3 TBSP Instant Coffee Granules

Method: (for all three versions)
In a small saucepan, measure out ½ cup of the milk, and sprinkle the gelatin powder over the top. Let rest for approx 8-10 minutes.

While the gelatin is sitting, measure the rest of the ingredients into a large blender and whiz quickly until well combined. Set aside.

When the gelatin/milk mixture has finished resting, turn the heat on medium low and heat gently, stirring often, until the gelatin is dissolved, approx 5-8 minutes. Do not boil!

When dissolved, remove from heat, and, with the blender running on low speed, carefully remove cap from blender lid,  and pour the hot gelatin mixture into the blender with the rest of the ingredients. Replace lid and turn on high to blend for 30 seconds.

Pour into desired serving dishes*** and chill for a minimum of 2 hrs or until fully set.
Round jars like this will not un-mold, but...will fit nicely in your lunch bag :)

If your ramekins have a small lip as
mine do, only fill to the bottom of this lip
or it will not come out easily. 

***Serving options
A: To eat as is:
pour into ½ or 1 cup mason jars, or other small vessels, and chill as above.
B: To un-mold:
Lightly grease small straight sided ramekins or other like vessels.
SIDES MUST BE STRAIGHT (or flare gently outwards) FOR THIS TO WORK!!
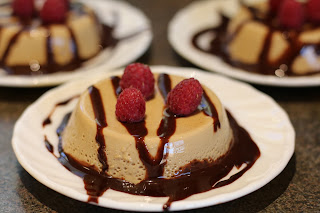
Pour into ramekins and chill as above. To Plate: Carefully run a knife around the edge of the Panna Cotta,  making sure you get right to the bottom of your vessel. Take care to be as smooth and even around the edge as possible.  (if doing this for the first time to serve to company, you may want to practice with a few to get the hang of it!) Carefully turn ramekin upside down over serving plate and using the knife carefully dislodge the Panna Cotta onto the plate. 
Garnish as desired.
(chocolate Sauce recipe pictured here can be found HERE)


Wednesday, 11 June 2014

Grain Free Dairy Free Rhubarb Coconut Bread Pudding


After perfecting my Lovely Grain Free Bread Recipe, using it in a bread pudding was a priority. With being gluten/almost grain free for close to 2 years, desserts like this, as well as the bread that would typically make this, have not been a part of our diet. When my bread turned out so amazingly well, I knew it would make a lovely bread pudding too. 

Our wonderful friends Ken and Ally were coming over for dinner, and I always try and create a decadent dairy free dessert for them. This was definitely a winner. The recipe makes a lot, feel free to half it if you wish. But, as Ally said the next day, it makes a wonderful breakfast, so you may want to make it as is, and share the extras with friends!

I used some nice flaky Maldon salt on the top of the puddings. If you don’t happen to have any, just add sea salt in with the liquids instead.

You won't use the entire loaf of bread with this recipe, the extra slices make nice croutons for a Ceasar Salad ;)


Grain Free Dairy Free Rhubarb Coconut Bread Pudding

3 cups chopped fresh rhubarb (approx 6-8 stalks, depending on size)
½ cup coconut sugar
--------
2 -400ml cans full fat coconut milk
8 eggs
1 tsp vanilla powder or 2 tsp vanilla extract
1/3 cup coconut sugar
2 T Grand Marnier (optional, you can substitute 2 T fresh orange juice and the zest of an organic orange)
1 tsp sea salt (omit if using the salt flakes at the end)
----------
¾ of a loaf of my Grain Free Bread (Get Recipe Here!) you should end up with about 6 cups of bread cubes)
----------
½ cup shredded coconut, unsweetened
----------
Maldon salt flakes (optional, alternately add 1 tsp of sea salt to the coconut milk mixture when mixing)
-------------
METHOD: 

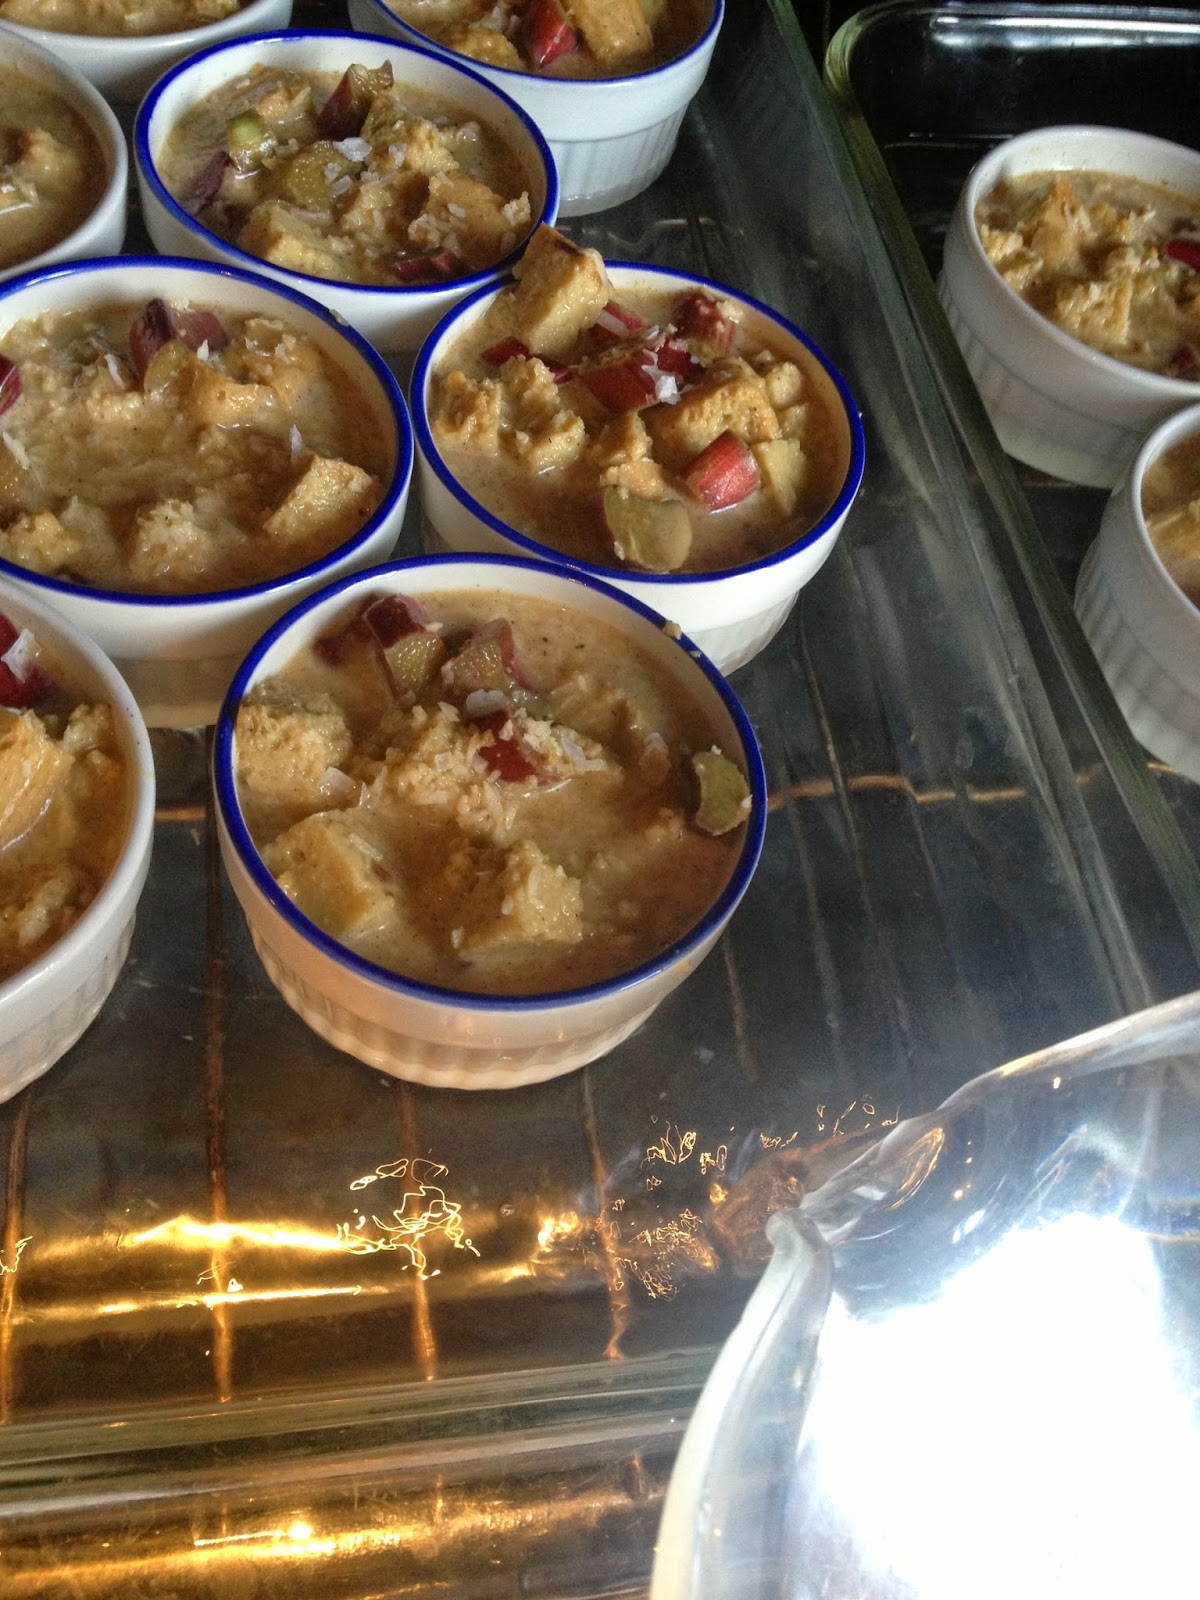
Preheat oven to 350F. Set 14 ramekins (mine hold approx 2/3 cup each, adjust accordingly if yours hold more or less) in baking dishes that will serve as a water bath, and set aside.  (9x13 glass baking dishes work well!) 

Combine the chopped rhubarb and the first amount of coconut sugar, and let it hang out and marinate for about ½ hour.  Stir the mixture a few times while you wait.

Combine coconut milk, eggs, vanilla, coconut sugar and optional Grand Marnier, (and optional salt if not using the Maldon salt flakes at the end), with an immersion blender until well blended.

Slice the grain free bread into 1 inch slices and then cut slices into cubes. 
Stir gently into the coconut mixture, and let hang out for about 5 minutes. Stir in the shredded coconut and the marinated rhubarb, and mix well.
Spoon this mixture into the waiting ramekins. Arrange the ramekins in the baking dishes. Sprinkle the tops of the bread puddings with the Maldon salt flakes if using.

Run your tap water until it is as hot as it will go. Fill a large measuring cup or other pour-able vessel with hot water.
Place the pans holding the ramekins into your preheated oven. Carefully pour the hot water into the pans, surrounding the ramekins and coming just over halfway up the sides of the ramekins.
Bake for 50-55 minutes, or until the puddings are cooked thru. They will lose their liquidy look and firm up when cooked thru.
Let cool before serving. Can be chilled completely, but they are good warm too!

Serve with a dollop of whipped cream if desired.