This blog is all about Food. Real Food. Food that Nourishes, Heart and Soul.

Real Ingredients, Organic and Locally sourced whenever and where ever possible, shared with love.

No packages, no ingredients that are impossible to pronounce.

Real, honest food, from my kitchen to yours. Enjoy!

Showing posts with label Fruit. Show all posts

Saturday, 25 July 2015

Easy Dairy Free Ice Cream

This ice cream is so many things all at once, I don't know where to start! It is refined-sugar-free, dairy-free, gluten-free, its easy, it stores wonderfully in your freezer, and, most importantly, it tastes divine. Wait... did I mention it's really easy?

With three simple ingredients and a food processor, you have everything you need to make this lovely summer treat! Customize the fruit to your taste buds! We have used frozen strawberries and oranges as well as the mango version below, but any type of frozen fruit would be delish!

(Yes, I know, the picture kind of looks like cupcakes...but it freezes beautifully in little parchment paper liners. When frozen, simply take it out of the pan and freeze in an airtight container in the freezer, or even a zip-lock freezer bag until you want to eat it. Then it is ready, in a perfect serving sized portion!

Chilling the coconut milk prior to starting this recipe is VERY important. (I actually keep a spare can in the fridge for just such occasions!). Between whipped coconut cream and this recipe, I have one ready whenever I need it!


Easy Dairy Free Ice Cream

1 can coconut milk, chilled overnight (very important, do not skip this step!)
3 cups frozen fruit
2 tbsp maple syrup or raw honey

Open your can of coconut milk upside down. 

Drain off liquid and set aside. 
Place solid coconut milk into the bowl of your food processor. Add frozen fruit; attach lid and pulse to start combining. 
Add maple syrup or honey while pulsing.
 If necessary, add the drained liquid from your can 1 tbsp at a time to loosen the ice cream enough to blend. You may need it all, you may not. (Mango seems to require the whole amount; it takes more to blend because they are very dense when frozen. Softer fruit like cherries, raspberries or blueberries will blend easier. )

You may need to stop the processor and scrape down the sides if your fruit is dense like the frozen mango's were. The more you process, the more the fruit will melt, do not over process or you will loose that necessary frozen texture.
As soon as it is smooth, turn off the food processor and scoop into desired containers to freeze.
Freeze for 2-3 hours minimum.  Store in airtight containers in freezer.  Remove from freezer and let stand 10-15 minutes before serving to soften slightly. 
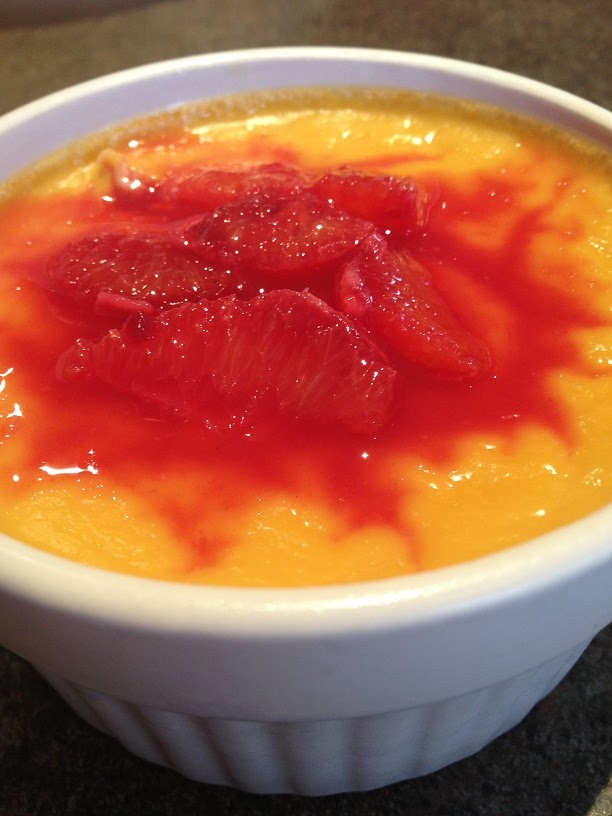
We found this set of 4 little melamine bowls at one of the PC Superstores, and they work wonderfully  for keeping a batch of ice cream ready to go in the freezer! We bought two sets, which are perfect for the 8ish servings that this recipe makes! Pictured here is a strawberry version!


Saturday, 21 September 2013

Grain Free Mini Blackberry Cobblers

When the weather starts to turn cooler, comfort foods always ease their way back into my cooking repertoire. (ease? Who am I kidding? Mostly they gallop!) It does help that my gas oven heats up the kitchen, great for cooler days, but not so great during the heat of summer!
 I had a bag of organic frozen blackberries in the freezer, and decided to make some individual cobblers with them. I borrowed the topping from my Honeyed Pear Upside DownSkillet Cake, changed it just slightly, and this was the result. We had them as is, but they would be lovely with a dollop of vanilla ice cream.
The topping made more than needed for the bag of blackberries I had, (I believe there is about 200g in the bag) for a nice cobbler to fruit ratio. Feel free to use it all if you like a "cakier" cobbler. I greased 2 extra ramekins and baked the excess topping for about 20 minutes, this would be an excellent grain free shortcake!

Grain Free Mini Blackberry Cobblers
1 bag Stahlbush Frozen Marion Blackberries (approx 200g) or other frozen fruit of choice
Zest of ½ a lemon
5 tsp coconut sugar
----------------
3 eggs
2 Tbsp chickpea flour
¼ cup coconut flour
2 Tbsp arrowroot flour
¾ tsp baking soda
Pinch of salt
2 Tbsp coconut oil
2 Tbsp coconut sugar
¼ cup kefir

Divide the bag of blackberries evenly between 5  one cup ramekins. Sprinkle each with 1 tsp of coconut sugar, and the lemon zest. Set aside.
Measure the rest of the ingredients into a mixing bowl, and mix well with an immersion blender or a wire whisk.
Divide batter between the 5 ramekins, (bake any excess in greased ramekins and save for another use, I had enough to make 2)
Bake at 400F for 20-25 minutes or until the batter is set (the ones with the batter only will be done in 18-20 minutes)


Serve warm or at room temperature. 
I see an awesome shortcake base here!

Friday, 10 May 2013

Kafir Lime Custard with Blood Orange Compote

I bought a bag of blood oranges at work a few weeks back, intending to create something yummy with them. But, then I was totally distracted with planning my cooking class, and the poor little beauties have been languishing in my fridge ever since.  Knowing I would be off today, and wanting to create something decadent yet somewhat healthy to serve my Mother-in-law for dinner tomorrow night for Mother’s Day Dinner, I started looking for a recipe that would showcase their loveliness. Nothing had all of the components I was looking for, so I had to get creative. (Just to show you how my brain works when deciding what to cook, the combination of this recipe, this recipe and this recipe led to the creation of my recipe...crazy but true) I think they turned out divine.
The blood orange compote, as simple as it is, is a wee bit messy and fiddly to make, but it is totally worth the effort. If you cannot get blood oranges, any other macerated fresh fruit would be lovely on top of this custard...I can see blueberries or raspberries as a wonderful substitution!
I am loving the coconut nectar lately, it adds a lovely flavour that marries so well with the kafir lime in this recipe! Feel free to substitute it for your sweetener of choice.

Kafir Lime Custard with Blood Orange Compote

Custard:
4 cups whole milk
½ cup coconut nectar (or other sweetener of choice)
6 kafir lime leaves
8 eggs, well beaten but not frothy
Pinch of salt
Compote:
6-8 blood oranges, depending on size, mine were small!
1 tbsp coconut nectar
Garnish:
¼ cup toasted coconut flakes

To make your custards:
Preheat the oven to 300F with the rack in the middle.

In a medium sized pot, combine the milk, first amount of coconut nectar and the kafir lime leaves. Warm slowly over medium heat, stirring often, until it just boils. Reduce heat to a simmer, cover and leave for 20 minutes to infuse the milk with the lime leaves.

Meanwhile, beat the eggs in a large mixing bowl until well mixed, but not frothy.

When milk is infused, stir in a pinch of salt, and remove the lime leaves.

Scoop out a cup of the warm milk, and add it slowly to the beaten eggs, stirring constantly. (this will temper your eggs so that they don’t cook when you add the rest of the hot milk) \

Add this mixture to rest of the warm milk in the pot. Stir well, and then pour thru a mesh strainer over your mixing bowl. This will remove any bits of cooked egg or lime leaves, and give you a smoother custard.
Place 9 ramekins in a large shallow pan. Fill each with approx ¾ cup of your custard mixture.  (adjust to the size of your ramekins if they are smaller or larger than mine!)

Carefully transfer your pan into your preheated oven.

Fill a 4 cup vessel that pours well with very hot tap water. (a kettle works well too!)
Pour carefully into your shallow dish to surround the ramekins. The water should come up the sides of the ramekins about ¾ of the way.

Bake for approximately 1 1/4 hours , or until they set.  If you insert a knife into the custard halfway between the middle and the edge, it should come out clean when they are cooked.

Remove them from the water bath and let cool for a good half hour, then refrigerate for at least 4 hours or up to 24. Wait until they are completely cool to cover them if you will be keeping them refrigerated for the 24 hrs.

To Make your compote:
Cut the top and bottom ends from your blood oranges to create a flat end on each. Cut the pith and peel away with a sharp knife (my serrated steak knife worked beautifully) being careful to not waste too much of the fruit on the peel.

Over a bowl, so that you can catch every drop of the delicious juice, cut the sections carefully away from the membranes. Place the membranes in a mesh sieve, you will press them at the end to get every last bit of juice. Continue with all of your oranges, and press the remaining “waste” thru your sieve into the bowl. Add the second amount of coconut nectar, and stir to combine. My oranges were pretty tiny, and I ended up with just over ½ a cup of juice and sections.


Just prior to serving, top each custard with a Tbsp of the compote, and garnish with the toasted coconut flakes.

Thursday, 21 March 2013

Grain-Free Blueberry Cobbler


I arrived home from work after a stressful day, craving some good old fashioned comfort food. A nice beef curry was already planned for dinner, but that, my friends, was not enough. I just so happened to have a bunch of nice organic blueberries that were begging to be used in something decadent, like a nice blueberry cobbler. But, that poses a problem when you have taken grains and refined sugars out of your diet. So, to my trusty laptop I went, to search for a grain free version. And I found nothing resembling the type of cobbler I was craving. Every recipe I found was much more “crisp” like, not the cakey-fruity combination that my stressed out psyche was craving. (I know, food should not be a crutch, but a girls gotta do what a girls gotta do!) So, I invented this, as a balm to my soul, and it was good. Very, very good. Almost guiltless comfort food, topped with fresh whipped cream…bliss in a bowl!

Grain-Free Blueberry Cobbler

Blueberry  layer
3 cups organic blueberries, rinsed and drained
2 Tbsp arrowroot powder
3 Tbsp maple syrup
Cobbler layer
1 cup almond flour
3 T coconut flour
½ tsp baking soda
½  tsp salt
3 eggs
2 Tbsp maple syrup
¼ cup milk (or milk substitute of choice)
1 tsp vanilla

Directions:
Preheat oven to 350F
In an 8x8 glass baking dish, toss the blueberries with the arrowroot flour. Drizzle with the first amount (3 tbsp) of maple syrup. Set aside.
In a medium mixing bowl, add all of the cobbler ingredients, and mix very well with an immersion blender or lots of elbow grease and a wire whisk. Coconut flour tends to clump, be sure to mix well! Pour evenly over the blueberry mixture and bake in the preheated oven for 40-45 minutes, or until the batter starts to turn a nice golden brown, and the blueberries start to bubble near the edges.
Serve either warm or at room temperature, with fresh whipped cream. 

Wednesday, 6 March 2013

Apple Nachos


I made this  to take to one of my nephews birthday gathering. Tasty, quick, and even (kind of) healthy! Recipe inspiration came from here:  http://www.greenplaterule.com/recipes/apple-nachos-enjoy-life-seed-and-fruit-review/. The Enjoy Life Not Nuts Seed And Fruit Mix (Mountain Mambo) suggested in the recipe was the perfect topping, because my nephew has a nut allergy, and these are nut free! One 46 g package was the ideal amount, and I happened to have some of them in my kitchen. If you cannot find this mix, it would be easy to throw together a similar mix of your own…I have listed some suggestions below.


Apple Nachos

6 apples (I used 4 Granny Smith and 2 Galas)
2 Tbsp Lemon Juice
½ cup water
1/3 cup chocolate chips
3 Tbsp cream (or enough to make your chocolate chip mixture able to drizzle)
1 -46 g pkg Enjoy Life not nuts seed and fruit mix (Mountain Mambo)
OR:
1/3 cup total of your choice of a mixture of any of these ingredients you choose: chopped walnuts, pecans, peanuts, sunflower seeds, pumpkin seeds, dried cranberries, chocolate chips, dried apples, dried apricots, coconut flakes etc)

Core the apples and slice into wedges, depending on your apple size you should get 16-20 slices per apple.
Mix together the lemon juice and water in a bowl, and dip all of the apple slices in the lemon juice.(this will stop the apple slices from browning) Let drain for a minute or two, and then lay out on a paper towel or tea towel, in a single layer, and blot with another towel, to remove any excess moisture. You want the slices dry so that your toppings will adhere, and not just run all over your plate!
Arrange 1/2 of the apples in a fairly thin layer on a serving tray and set aside.
In a heat proof bowl over boiling water, melt the chocolate chips and the cream until they make a smooth sauce, thin enough to drizzle, but not too thin.
Drizzle 1/2 of the sauce over apples and top with 1/2 of the Nut/Fruit mix or the mix of your choice.
Repeat with remaining apples, sauce and toppings.
Let cool in the fridge for approx 1 hr to let the chocolate set.
Serve chilled!