This blog is all about Food. Real Food. Food that Nourishes, Heart and Soul.

Real Ingredients, Organic and Locally sourced whenever and where ever possible, shared with love.

No packages, no ingredients that are impossible to pronounce.

Real, honest food, from my kitchen to yours. Enjoy!

Monday 16 July 2018

Garlic Scape Pesto

It is scape season again!! When we moved last year, I had no garden to speak of at the new house to plant my garlic (nor the time to make one with all the renovations) I had a mild panic attack!! NO GARLIC???? How would I survive?? Alright, I may be over exaggerating just a bit, but I did have to get creative and carve out a small spot of my front garden bed late in the fall to get it in the ground. I managed to get over 100 heads of garlic planted in a very tiny spot. Crisis averted! We will not be without garlic this year, or scapes!!
I harvested all of the scapes last week, and have been trying to eek out some time to get them used up. (they do store quite well in the fridge...in an airtight container you'll get at the very least a few weeks out of them!)

After work today, I had some time and lots of ambition (keto Popsicles, BBQ chicken, this pesto, and a big batch of scape and basil compound butter ) This pesto recipe, I am embarrassed to say,  has been sitting in my drafts for a year folks...a year!!! Note the date on the little jar of pesto below...2017!!!!!! This tells you how busy my last year has been!!! )  The garlic itself looks almost ready to pull as well. This southern Ontario heat wave has certainly helped!
the garlic corner by our front step!

So, if you can find some scapes, make up a batch of this pesto! It really is delicious!

Garlic Scape Pesto

30 ish garlic scapes (you want about a cup of chopped scapes. 
½ cup roughly chopped basil
1 cup walnuts
1 cup freshly grated Parmesan
Freshly ground black pepper to taste
¾ tsp sea salt
Juice and zest of 1 lemon
------
½ cup avocado oil (alternatively use EVOO)

In bowl of food processor, pulse scapes until finely chopped. Add the rest of the ingredients EXCEPT for the oil. Pulse a few times and then run until all ingredients are chopped and combined into a thick paste. Slowly drizzle in the oil until everything is emulsified and somewhat smooth.
Use as desired right away or refrigerate for up to 5 days.
Alternatively, freeze in small mason jars to enjoy at a later time.

delicious on grilled zucchini!


Thursday 5 July 2018

Keto Pannacotta with Roasted Strawberry Rhubarb Topping


I've been a bad blogger of late, and offer heartfelt apologies for not sharing many recipes over the past while. I've been on a bit of a ...digestive journey?... for lack of a better way to put it! With the help of my naturopath, I feel like I am making some headway in my digestive health, but it has definitely changed the way I have been eating, as well as my creation of new recipes. 
It has been a journey...I've been off dairy, back on dairy, and now off  all soy, cane sugar, and potatoes, (which includes arrowroot and tapioca starch...for those that have followed my baking in the past...you will understand the lack of baking!!) But...I am feeling much better digestively, so I am more than willing to keep following this path! One major thing that I have noticed is my almost complete lack of sweet tooth now. The only sweetener I have used lately is the Lakanto Monkfruit sweetener , but very sparingly. I  find I am not missing sugar at all!!

So, here's were we enter the Keto craze! Being very similar to the way I've already been eating lately, I decided to give it a go, and see if I could budge some of the weight I have slowly and steadily put on over the past few years. After figuring out my Macros (thanks to my son...lol) and using a tracker to log my meals, I am making progress! But...you all know me well...my creative cook side has been dying to come up with some Keto friendly treats...which leads us here today! I love pannacotta, it is such an easy but elegant dessert for hot summer days. I used my regular pannacotta recipe from this blog as a guide, and created this one, that is both Keto friendly and delicious!! 

This is the very first Keto recipe I have posted, but if you follow me on Instagram, I have posted pic's of many meals over the past few weeks. If there is anything posted there you would like to see written out, let me know!! 

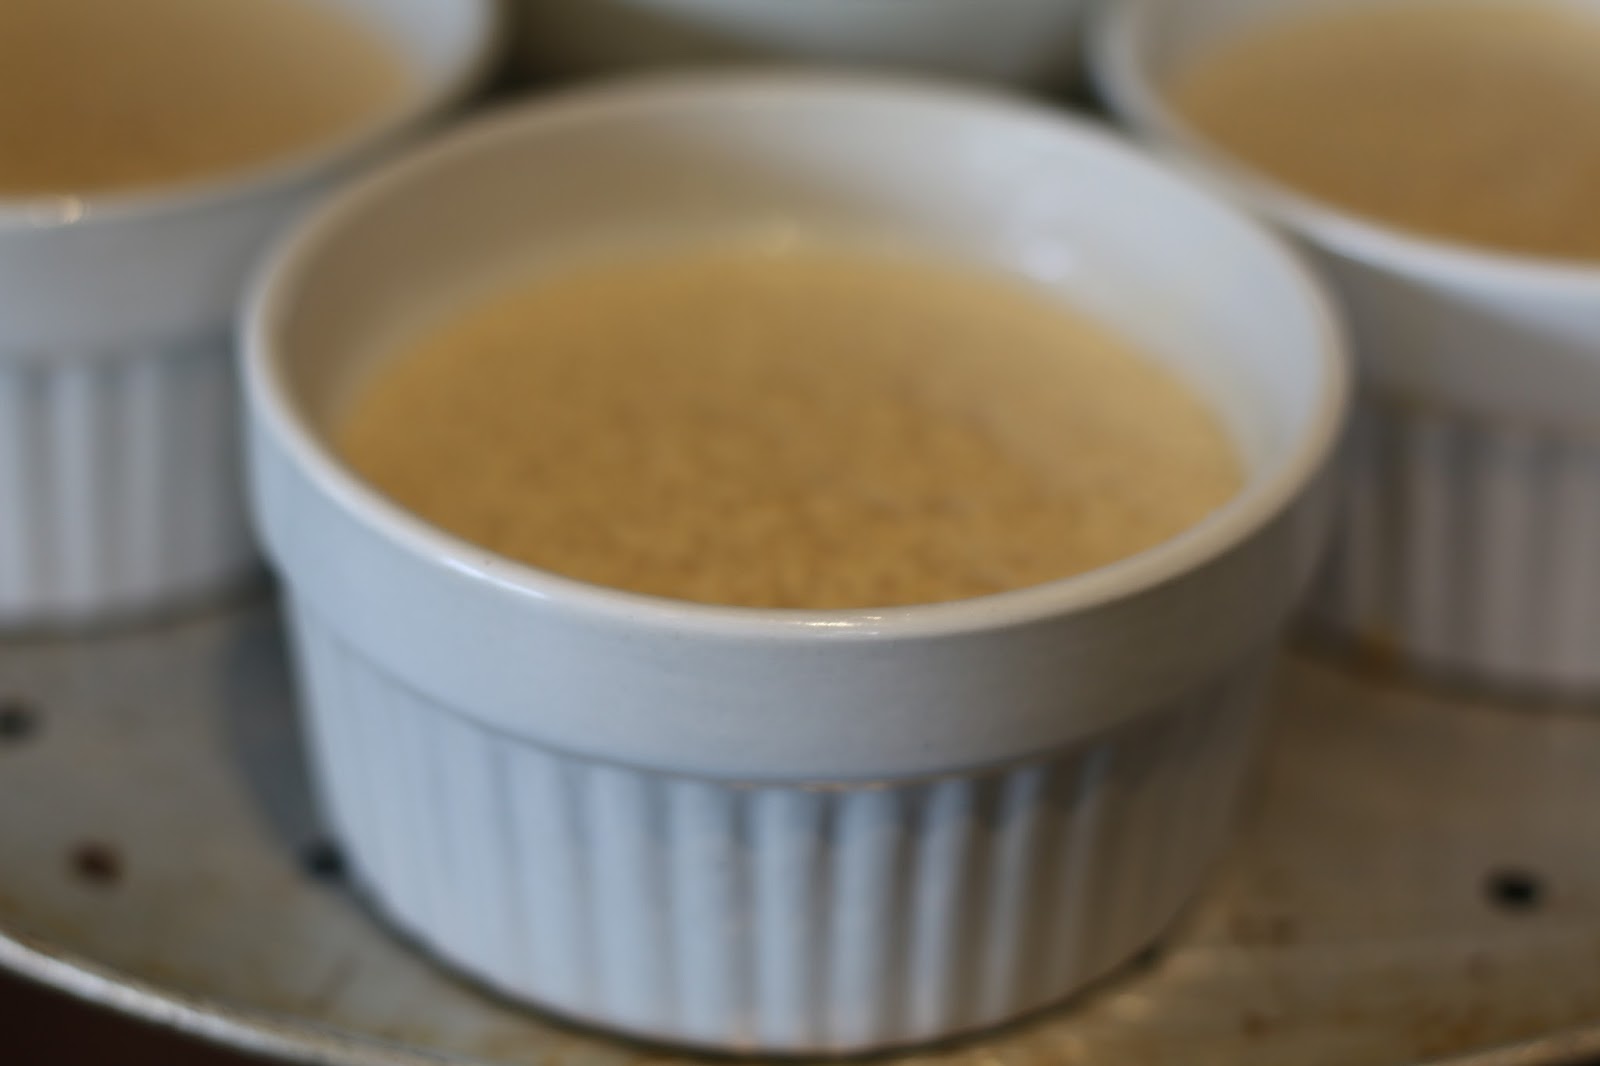
Keto Pannacotta (non dairy)
Makes 6 servings , approx 56 calories each, with 5g carbs, 4 g fat, 1 g protein per serving)
4 tsp gelatin
½ cup water
1 can evaporated coconut milk (see pic at the bottom of this post for the brands I used)
Sweetener of choice (completely optional…I didn’t include any as this coconut milk already has a bit of coconut sugar in it, and I find it perfectly sweet enough for me)

Measure your water into a small pot. Sprinkle the gelatin evenly over the water and let sit for about 8 minutes. After the 8 minutes, place over low heat and stir until gelatin is dissolved. Don’t boil!!
When it is completely dissolved, add the can of evaporated coconut milk and stir well. Add additional sweetener of choice here if using!) Stir well.
Pour into 6 small containers (I use small mason jars with lids. Great for storage and my lunch bag!, but small ramekins would work as well. )

Chill for a minimum of 2 hrs before serving to give it time to set well, especially if you are going to unmold it to plate!
To unmold: run a sharp NON SERRATED knife (a serrated blade will leave funky patterns on the edge of your pannacotta…not so pretty!!) around the edge of the jar or ramekin, turn upside down, and with a gentle shake, unmold your panna cotta onto serving plate.
Alternatively, place topping on top of panna cotta in serving container and serve as is! (see picture below of a regular panna cotta with a mango topping for inspiration!)
Top with topping of choice and serve!


Keto Roasted Strawberry Rhubarb Topping
(makes approx 2 cups, I use about 1.5 tbsp as a serving size...approx 17 calories, 3 net carbs, 1 g protein and 1 g fat)
200 g of rhubarb, cut in smallish pieces (I used approx 5 stalks that were about 12 inches long, they were about finger sized in diameter, for an easy reference)
½  lb strawberries (I used ½ of the clamshell container!)cut in ½ or ¼’s, depending on the size of your berries. You want the chunks to be smaller, just a bit bigger than the rhubarb.
2 tsp Lakanto Monkfruit sweetener (or sweetener of choice)
½ cup water
1 tbsp chia seeds

Preheat oven to 375F
In a glass 8x8 baking dish, place your chopped fruit. Pour in the water and sprinkle sweetener evenly over the fruit. Bake for approx 25 minutes, or until your rhubarb is softened up nicely. Remove from oven and set aside to cool slightly( 10-15 min). Stir in the chia seeds and let stand for approx 20 minutes, stirring often. This will thicken up the liquids and give a loose jam like consistency to your fruit.

When fruit is room temperature, transfer to serving dish or storage container for future use. (2 cup mason jar is perfect!) Keep refrigerated! (should last 4-5 days in the fridge)
used these in the recipe!

this is a regular pannacotta that I made a while back,
with a pureed mango topping, but it gives you an idea
for presentation...I used stemless wine glasses...pretty!!
One of the meal's I posted on Instagram, soooo yummy!!


Wednesday 19 July 2017

Grain Free Zucchini Loaf


Some days, you just need to bake (well...I do anyway...!!!) Those who know me well are aware that when my stress level gets high, nothing calms me like some kitchen time, with the music cranked (and sometimes a glass of wine...it helps with the whine :) )  

We have alot going on right now, with buying and selling a house, packing, 
and renovations on the newly bought house starting very soon.  
So, after a crazy day of work...and meetings...and lawyers... and house stuff... 
I came home with a SERIOUS need to de-stress. 
With my zucchinis going crazy in the garden (no one in their right mind should ever plant 4 zucchini plants!!!) 

I decided to play with my 
recipe and turn it into a zucchini loaf. It worked well enough to share, 
so here it is! 


I made up a batch of this Maple Cashew Cream Frosting (I had envisioned a lemony cream cheese topped loaf, but...that would have entailed a trip back out to the grocery store...and that was NOT happening lol!!)  A bit of searching for a recipe,  and with all of these ingredients on hand, I bravely unpacked my food processor and gave it a go. It matched the flavour of the loaf perfectly, and was not too rich or sweet. I will definitely use it again! 
Thanks CotterCrunch for a great topping for my loaf! 
Pictured here with this amazing Maple Cashew Frosting


Grain Free Zucchini Loaf

1/2 cup coconut flour

1/3 cup of kefir or yogurt

4 eggs, preferably pastured

1 tsp baking powder

½ tsp salt

1/3 cup coconut sugar

1/3 cup organic coconut oil, softened

1 tsp organic cinnamon

¼ tsp freshly grated nutmeg

Pinch of cloves

Whiz all of these ingredients together with a stick blender (or whisk if you are feeling particularly ambitious!) until very well incorporated. 

Add:

1 cup grated zucchini, (with liquid squeezed out as much as possible!!)

½ cup chopped walnuts

1/3 cup organic  raisins

Mix well, ensuring ingredients are thoroughly mixed. Let batter stand for 5 minutes to thicken up.

Scoop into parchment lined or well greased loaf pan.

Bake at 350 for 35-40 minutes, or until a toothpick inserted in the middle comes out clean.
(my pan was quite large, 9X5 I think?  If yours is smaller, you will need to adjust your baking time until it is cooked thru!)

Let cool 5 minutes in pan before removing to a rack to cool.

Keep at room temp for the first day, refrigerate after that for a few days, if you have any left!!


Saturday 15 July 2017

Espresso Panna Cotta

Coconut Milk version,
 using a 1/2 cup Mason Jar
pan·na cot·ta
ˌpanə ˈkōdə,ˌpanə ˈkädə
noun
  1. -"a cold Italian custard, often served with fruit sauce or caramel syrup".

Panna Cotta translates from Italian to mean "cooked cream", and has become my favourite summer dessert this year. 
Elegant in its presentation, and simplistic in its preparation, its a win win dessert that doesn't even heat up your kitchen! It does require some time to set properly, so plan accordingly if you want it ready for dessert!

"Richer" version, using a 1 cup  Ramekin, filled 3/4 full
I have made multiple versions of this espresso version this summer, and decided to post my three favourite variations, as they all shine in their own way, and deserve a wee bit of the spotlight, depending on your tastes and dietary needs!
The lighter version is great when you want a dessert that is a bit less substantial, but every bit as lovely and tasty as the other versions. The "richer" version has a much creamier texture and velvety smooth mouth-feel that ups the ante a notch or two, making it just that wee bit more decadent. In the dairy free version (created just for my foodie friend Ken!) the coconut milk marries so well with the coffee flavour, it just might be my favourite... if I was ever forced to choose just one...  

Although I haven't tried it yet, you can also make Panna Cotta with fruit juice...picture a lovely mango Panna Cotta topped with a blackberry thyme coulis....I can see many more versions being created before summer is over!

This recipe does make quite a few Panna Cotta's, depending upon the size of container you choose. You will end up with approx 6 cups of liquid Panna Cotta, so choose your serving sizes accordingly. (feel free to cut the recipe in half, but the extras are a lovely indulgence to keep in the fridge ;) ..... 

When I am making it for company, I will choose several straight sided containers that will un-mold well (short mason jars, ramekins etc) and then pour the rest into various mason jars with lids, to be eaten straight out of the vessel as a treat in our lunches.  

A few quick notes on my choice of ingredients:
  • For the espresso flavour, I like to use Mount Hagen Organic  Instant Coffee. They have a regular and decaf version, that gives a seriously impressive coffee flavour to this dessert. 
  • Coconut sugar is almost always my sweetener of choice, for its lower glycemic rating, and its caramel like flavour. The darker colour will affect the end colour of your Panna Cotta, so if you were making a plain version of this without the coffee granules, you may want to substitute with an organic white sugar or honey to eliminate the caramel colour that this will give. So, feel free to substitute with your sweetener of choice. (I am thinking maple syrup may work well with the espresso flavour as well...hmmmm....)
Enough of my rambling, lets get to the recipe!! 

Espresso Panna Cotta, 3 Ways: 

Lighter Version
Full Fat “Richer” Version
Dairy Free Version
6 cups milk, your choice of lower or full fat
4 cups full fat milk PLUS
2 cups , full fat sour cream
3 cans (400ml)  full fat coconut milk
2 ½ TBSP gelatin powder
2  TBSP gelatin powder
½ cup Coconut sugar
½ cup Coconut sugar
1/3 cup Coconut sugar
3 TBSP Instant Coffee Granules

Method: (for all three versions)
In a small saucepan, measure out ½ cup of the milk, and sprinkle the gelatin powder over the top. Let rest for approx 8-10 minutes.

While the gelatin is sitting, measure the rest of the ingredients into a large blender and whiz quickly until well combined. Set aside.

When the gelatin/milk mixture has finished resting, turn the heat on medium low and heat gently, stirring often, until the gelatin is dissolved, approx 5-8 minutes. Do not boil!

When dissolved, remove from heat, and, with the blender running on low speed, carefully remove cap from blender lid,  and pour the hot gelatin mixture into the blender with the rest of the ingredients. Replace lid and turn on high to blend for 30 seconds.

Pour into desired serving dishes*** and chill for a minimum of 2 hrs or until fully set.
Round jars like this will not un-mold, but...will fit nicely in your lunch bag :)

If your ramekins have a small lip as
mine do, only fill to the bottom of this lip
or it will not come out easily. 

***Serving options
A: To eat as is:
pour into ½ or 1 cup mason jars, or other small vessels, and chill as above.
B: To un-mold:
Lightly grease small straight sided ramekins or other like vessels.
SIDES MUST BE STRAIGHT (or flare gently outwards) FOR THIS TO WORK!!
Pour into ramekins and chill as above. To Plate: Carefully run a knife around the edge of the Panna Cotta,  making sure you get right to the bottom of your vessel. Take care to be as smooth and even around the edge as possible.  (if doing this for the first time to serve to company, you may want to practice with a few to get the hang of it!) Carefully turn ramekin upside down over serving plate and using the knife carefully dislodge the Panna Cotta onto the plate. 
Garnish as desired.
(chocolate Sauce recipe pictured here can be found HERE)


Friday 7 July 2017

Garlic Scape Lemon Compound Butter


I love garlic scapes. They are the yummy precursor to the lovely garlic that gets harvested towards the end of summer in my garden.,,,kind of like a bonus harvest on a garden staple, fleeting but delicious! Many farmers markets and stands sell them if you don't grow your own garlic so be sure to look for them from mid June to early July.
I do tend to stick to my favourite recipes with scapes, (like pesto, and this recipe below for compound butter) but they are very versatile and can be used for many different recipes if you are creative! (do a pinterest search...they are used in absolutely  EVERYTHING!!! ) I chopped a bunch this year in my food processor and froze them in an ice cube tray so that we can hopefully enjoy the harvest for way longer than we usually do. (see pics below!!)

This compound butter can be used for a multitude of things, from buttering my grain free baguettes, to topping baked potatoes, to searing a cast iron cooked steak. It's lovely vibrant green colour and garlicky bite  transform a multitude of foods to a completely different level of flavour.

Try this recipe before the scapes are gone again for the season!!

Garlic Scape and Lemon Compound Butter

Approx 8-10 garlic scapes, roughly chopped (you want to end up with about 1/ 2 cup when finely chopped)
¾ cup butter cut into 6 chunks (mine was not quite room temp but not cold either!)
Zest of 1 lemon (ALWAYS organic!!)
Juice of 1 lemon
S&P to taste (if butter is salted, as mine often is... add less salt!!)

Pulse garlic scapes in food processor until finely chopped.  (shown with LOTS of scapes, I scooped out a bunch to be left with 1/2 cup)
With machine running, add butter 1 chunk at a time until smooth and incorporated. 

Stop the processor, add the lemon juice, zest, s&p, and turn back on until incorporated, stopping to scrape down sides as needed 

Scrape out of processor and shape into log on plastic wrap. (shown on waxed paper, but plastic wrap works best)

Refrigerate until firm and slice as needed. For storage longer than 5 days, keep in freezer.
Shown on my  grain free baguette :)

chopped and prepped for freezer

covered ice cube tray is perfect for freezing :)


Wednesday 10 May 2017

Curried Millet and Veggie Salad

At the beginning of May, the health food store that I work for (Goodness Me!) ran a Community Cleanse Challenge, both for the community to join in, as well as staff. (my store won for best overall store participation...woot woot team Brantford!!!)

Anyhoo, both my husband and I jumped on the cleanse bandwagon, and for two weeks have been eating clean and healthy. Our diet is already pretty clean, but its sometimes good to check in on all the little habits that creep back into your diet and linger. A cleanse is a great reset...it gives your digestive system a great spring cleaning!! 

I was looking for something different to cook for dinner one night, and saw millet listed on the chart  of "ok" foods. So I cooked a big batch pot of this delicious little seed (yes, it is technically a seed, not a grain!) for dinner and then had to come up with a use for the rest. I had a fridge full of veggies for eating on the cleanse, so I started chopping and this salad was born!

It keeps really well in the fridge for 3-4 days, and is great warm or cold. We  topped it with both salmon and chicken to add some protein, and I think it would be great with chickpeas for a vegan version. It makes enough for a crowd, or for several meals during the week. Definitely a keeper recipe, cleansing or not!! If you don't have any millet, cooked quinoa would be a great alternative!! 

Curried Millet and Veggie Salad

3 cups cooked millet (I toasted mine first, follow this link for cooking instructions! )   
3/4 cup raw pumpkin seeds
4 cups chopped kale (green, red, black or a combo!)
1 cup celery, diced
1 cup diced red pepper (red, yellow, orange…mix it up!!)
1 cup diced zucchini ¼ - ½  cup cilantro, chopped (optional if you hate it!!)

Dressing:
1/4 cup lemon juice (freshly squeezed if you can!)
4 Tbsp avocado or olive oil
1-2 tsp curry powder
1 tsp cumin
1 tsp herbamare or sea salt
freshly ground pepper to taste

Mix veggies, seeds and millet in a large mixing bowl.

Measure dressing ingredients into a mason jar, shake well and toss with other ingredients. 
Eat as is, or add your choice of protein (pre-cooked chicken, salmon, beans...the choice is yours!)
(Its also delicious heated!!!)
Store covered in the fridge for 3-4 days. 
All ready for lunch with some leftover salmon!


Sunday 12 March 2017

Orange Chocolate Chia Donuts (Grain Free, Gluten Free, Sweetened with Honey)


These little heavenly morsels were created for two reasons. The first being that I was ever so kindly given a bag of Salba Chocolate Chia Seeds a while back to see if I could come up with a recipe to incorporate them into (thanks Deb!) They have been sitting staring at me for way too long, awaiting a burst of inspiration for a new recipe. 

On to reason number two… We have been house hunting as of late, and our wonderful agent-who-is-also-my-sister-in-law has been driving us around kingdom-come for a number of weeks. We were embarking on another road trip and I wanted to surprise her with some tasty treats for the drive. (She is celiac, so cooking for her, with all of my own dietary issues, is a proverbial piece of cake!) So on went my thinking cap. My brain jumped to donuts pretty quick, and these lovely little chocolate coated chia seeds were screaming at me to use them. I also had some beautiful organic cara-cara oranges, for further inspiration. Chocolate and orange is such a classic combination that is so well represented in these lovely little morsels, I was absolutely thrilled with the results! The texture is not unlike a poppyseed muffin or loaf, with a delightful bit of crunch, and the mix of flavours conjures
 a little happy dance in your mouth!  So, to Deb and Jo, a labour of love, and a brand new recipe!

This is also my first post using pictures taken with my son Mac's amazing camera..I am totally enamored with it..(so much that he had to buy me my own memory card so I quit filling up his...)

Orange Chocolate Chia Donuts

½ cup tapioca starch
½ cup coconut flour
1 tsp baking soda
¼ tsp salt
3 eggs
Zest from 1 orange (make sure its organic!)
Juice from one orange (3-4 tbsp approx)
¼ cup melted coconut oil (***see end of post for handy tips to melt your oil!)
¼ cup honey
¼ cup kefir, yogurt or non dairy alternative
______
¼ cup chocolate chia seeds (Salba brand)

Preheat oven to 350F

Grease the donut pan with coconut oil or butter and set aside.
I love my silicone baster for greasing pans!!

Measure all ingredients except chia seeds into a large mixing bowl and mix with an immersion blender until well blended. If you measure your coconut oil first, and then use the same scoop for your honey, it will slide right out of the cup, no scraping required!! 
Handy dandy kitchen rasp is awesome for zesting citrus fruits!
be sure to zest first, and then cut and juice your orange !


 Ensure no lumps are left.

Stir in the chocolate chia seeds and let stand for 5 minutes to thicken up.
Scoop batter into a zip top bag, squeeze out the air, zip, and cut off one bottom corner of the bag (alternatively use a piping bag with no tip), 
fold the edge of your zip bag down when filling to keep it clean!

and squeeze evenly into pre-greased donut pan.
 
Bake in preheated oven for approx 10-12 minutes or until cooked thru.
Tip out onto wire cooling rack to cool completely before enjoying!
Store at room temp in an airtight container for 2-3 days. 
Alternatively freeze for later enjoyment!
 

***How to melt your coconut oil with ease!!
I keep my coconut oil in a mason jar, and melt it one of two ways: 
1. in-front of the vent on my
gas stove-top

2. immerse jar in your hottest tap water until
melted enough to pour out your measurement!